crwdns2931529:0crwdnd2931529:0crwdnd2931529:0crwdnd2931529:02crwdnd2931529:0crwdne2931529:0
crwdns2935425:02crwdne2935425:0
crwdns2931653:02crwdne2931653:0


-
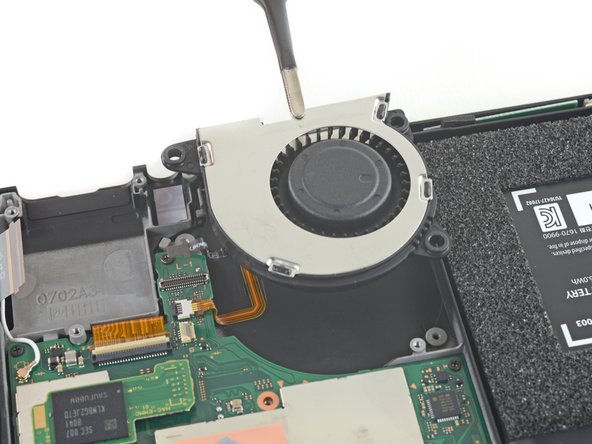
Use a pair of tweezers or your fingers to lift the fan straight up and remove it from the device.
| - | [* black] Use a pair of tweezers or your fingers to lift the fan straight up and remove it from the device. |
|---|---|
| + | [* black] Use a pair of [product|IF145-020|tweezers] or your fingers to lift the fan straight up and remove it from the device. |
| [* icon_note] Compare your new replacement part to the original part. You may need to transfer remaining components (such as the rubber bushings) to the new part before installing. |
crwdns2944171:0crwdnd2944171:0crwdnd2944171:0crwdnd2944171:0crwdne2944171:0