crwdns2933423:0crwdne2933423:0

Nintendo Switch フロントフレームの交換

crwdns2931529:0crwdnd2931529:0crwdnd2931529:0crwdnd2931529:02crwdnd2931529:0crwdne2931529:0

crwdns2936315:0crwdne2936315:0
crwdns2936323:0crwdne2936323:0
crwdns2931653:027crwdne2931653:0
Nintendo Switch Front Frame Replacement: crwdns2935265:00crwdnd2935265:01crwdnd2935265:03crwdne2935265:0 Nintendo Switch Front Frame Replacement: crwdns2935265:00crwdnd2935265:02crwdnd2935265:03crwdne2935265:0 Nintendo Switch Front Frame Replacement: crwdns2935265:00crwdnd2935265:03crwdnd2935265:03crwdne2935265:0
  • Heat the right edge of the screen for around two minutes to help soften the adhesive.

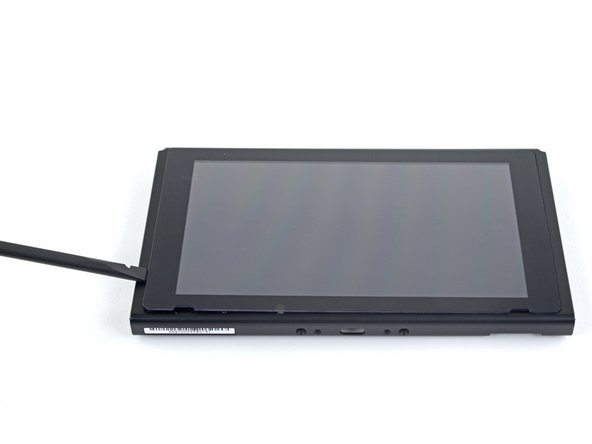
  • Place the flat end of a spudger into the gap along the left edge of the screen.

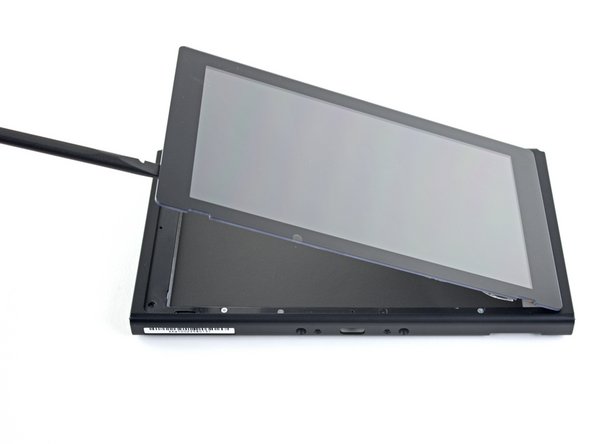
  • Carefully and slowly lift the left edge of the screen, opening it like a book.

スクリーンの右端を約2分間温めて、接着剤を温めます。

スパッジャーの平面側先端をスクリーン左端に沿った隙間に差し込みます。

スクリーンの左端をゆっくりと持ち上げます。

crwdns2944171:0crwdnd2944171:0crwdnd2944171:0crwdnd2944171:0crwdne2944171:0