crwdns2933423:0crwdne2933423:0

Comment réparer le face ID de l'iPhone 13 quand il ne fonctionne pas

crwdns2936315:0crwdne2936315:0
crwdns2936317:0crwdne2936317:0
crwdns2931653:08crwdne2931653:0
How to Fix iPhone 13 Face ID Not Working: crwdns2935265:00crwdnd2935265:01crwdnd2935265:03crwdne2935265:0 How to Fix iPhone 13 Face ID Not Working: crwdns2935265:00crwdnd2935265:02crwdnd2935265:03crwdne2935265:0 How to Fix iPhone 13 Face ID Not Working: crwdns2935265:00crwdnd2935265:03crwdnd2935265:03crwdne2935265:0
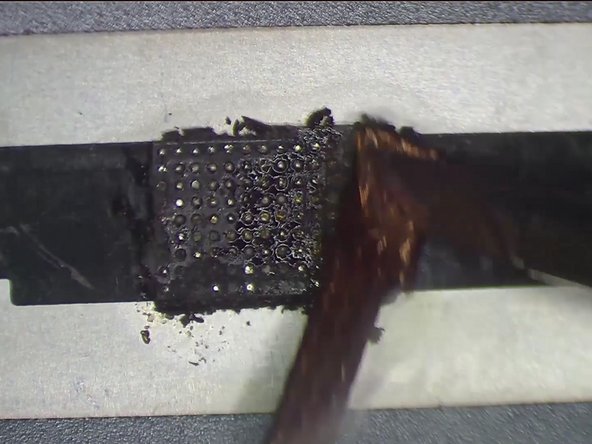
  • Next, remove the chip on the original screen with the same method.

  • Clean tin on the chip of the original screen. Apply some middle-temperature Solder Paste to the bonding pads. Clean tin and black adhesive on the bonding pads of the chip with Solder Wick. Keep cleaning the bonding pads with PCB Cleaner.

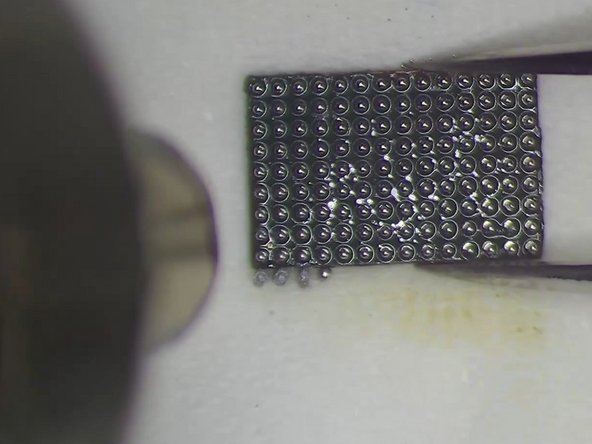
  • Next, reball the chip. Put the reballing stencil in position. Apply a layer of middle-temperature Solder Paste evenly.

Ensuite, retirez la puce de l'écran d'origine en suivant la même méthode.

Nettoyer l'étain sur la puce de l'écran d'origine. Appliquez de la pâte à souder à température moyenne sur les plots de connexion. Nettoyez l'étain et l'adhésif noir sur les plots de connexion de la puce à l'aide d'une tresse à dessouder. Puis, nettoyer les plots de connexion avec du nettoyant PCB.

Ensuite, il faut re-biller la puce. Mettez le pochoir de rebillage en place. Appliquez uniformément une couche de pâte à braser à température moyenne.

crwdns2944171:0crwdnd2944171:0crwdnd2944171:0crwdnd2944171:0crwdne2944171:0