crwdns2933423:0crwdne2933423:0

Reemplazo del Conjunto de la placa base de Microsoft Surface Pro 5

crwdns2931529:0crwdnd2931529:0crwdnd2931529:0crwdnd2931529:02crwdnd2931529:0crwdne2931529:0

crwdns2936315:0crwdne2936315:0
crwdns2936331:0crwdne2936331:0
crwdns2931653:016crwdne2931653:0
Microsoft Surface Pro 5 Motherboard Assembly Replacement, Remove the two large EMI shields: crwdns2935265:00crwdnd2935265:01crwdnd2935265:03crwdne2935265:0 Microsoft Surface Pro 5 Motherboard Assembly Replacement, Remove the two large EMI shields: crwdns2935265:00crwdnd2935265:02crwdnd2935265:03crwdne2935265:0 Microsoft Surface Pro 5 Motherboard Assembly Replacement, Remove the two large EMI shields: crwdns2935265:00crwdnd2935265:03crwdnd2935265:03crwdne2935265:0
Remove the two large EMI shields
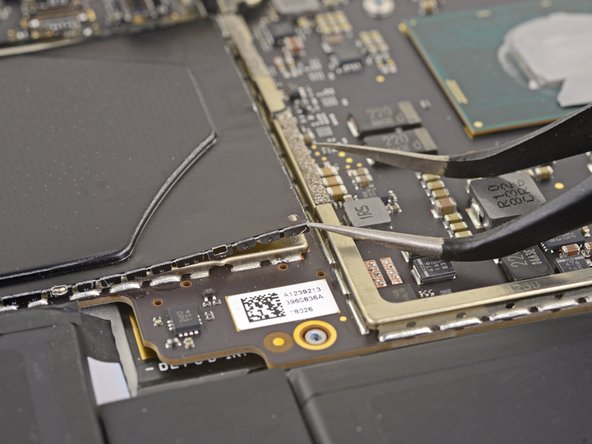
  • Insert one point of a pair of pointed tweezers into a gap in the corner of the left-most of the remaining large EMI shields.

  • Use the tweezers to pry the EMI shield away from the motherboard as much as you can without bending it.

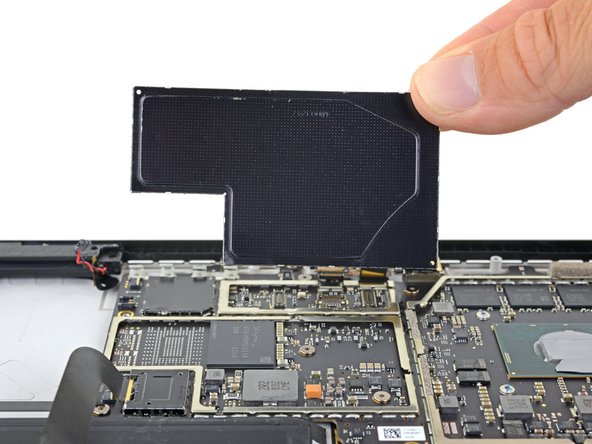
  • Repeat this procedure at different points around the shield until it is free. Remove the shield.

  • Try not to deform the shield too much—you will need to reinstall it during reassembly.

  • Take care not to puncture the battery with the tweezers while working on this shield.

Inserta una punta de un par de pinzas puntiagudas en un espacio en la esquina del extremo izquierdo de los escudos EMI grandes restantes.

Usa las pinzas para separar el escudo EMI de la placa base tanto como puedas sin doblarlo.

Repite este procedimiento en diferentes puntos alrededor del escudo hasta que quede libre. Retira el escudo.

Trata de no deformar demasiado el escudo; deberás volver a instalarlo durante el montaje.

Ten cuidado de no perforar la batería con las pinzas mientras trabajas en este escudo.

crwdns2944171:0crwdnd2944171:0crwdnd2944171:0crwdnd2944171:0crwdne2944171:0