crwdns2931529:0crwdnd2931529:0crwdnd2931529:0crwdnd2931529:02crwdnd2931529:0crwdne2931529:0
crwdns2935425:06crwdne2935425:0
crwdns2931653:06crwdne2931653:0


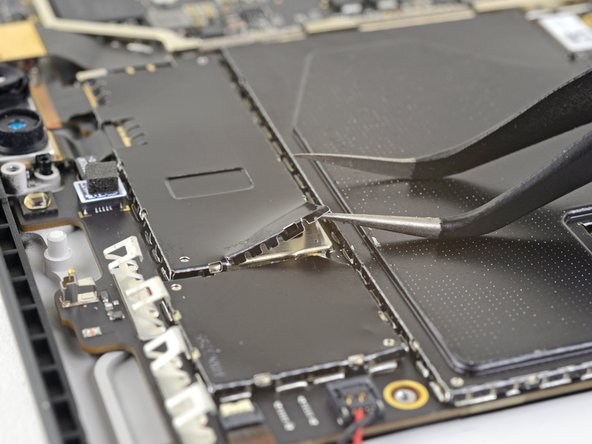
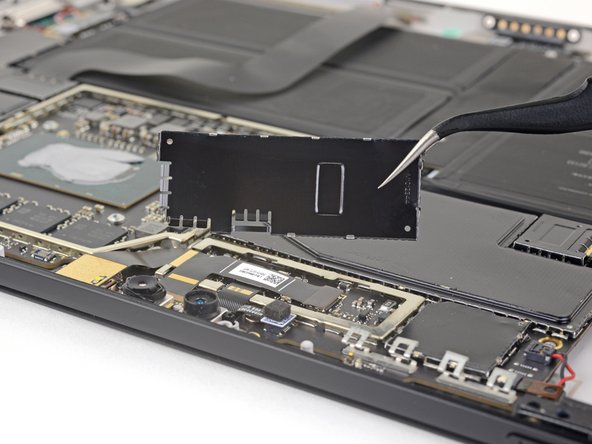
Remove the camera connector shield
-
Insert one point of a pair of pointed tweezers into a gap in the corner of the EMI shield covering the camera connectors.
-
Use the tweezers to pry the EMI shield away from the motherboard as much as you can without bending it.
-
Repeat this procedure at different points around the shield until it is free. Remove the shield.
| [title] Remove the camera connector shield | |
| - | [* black] Insert one point of a pair of pointed tweezers into a gap in the corner of the EMI shield covering the camera connectors. |
| + | [* black] Insert one point of a pair of [product|IF145-020-2|pointed tweezers] into a gap in the corner of the EMI shield covering the camera connectors. |
| [* black] Use the tweezers to pry the EMI shield away from the motherboard as much as you can without bending it. | |
| [* black] Repeat this procedure at different points around the shield until it is free. Remove the shield. | |
| [* icon_caution] Try not to deform the shield too much—you will need to reinstall it during reassembly. |
crwdns2944171:0crwdnd2944171:0crwdnd2944171:0crwdnd2944171:0crwdne2944171:0