crwdns2935425:08crwdne2935425:0
crwdns2931653:08crwdne2931653:0


-
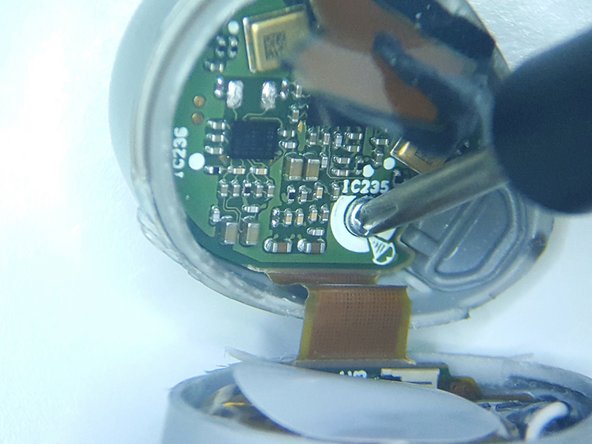
Peeling back the Antenna from the double sick tape revealed the Main PCB, and that the Main PCB is held in place with a Phillips Head #00 Screw that was also marked on the PCB
-
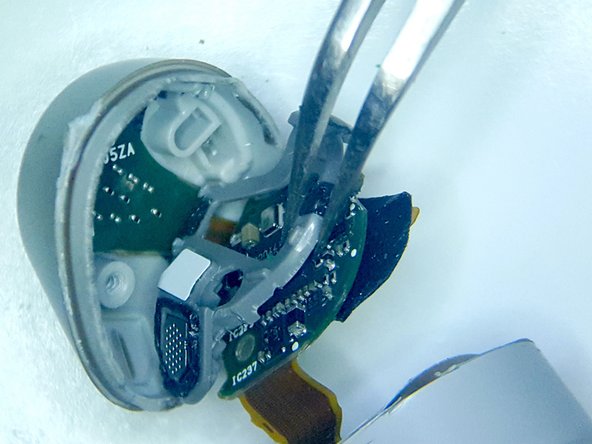
Once the Phillips Head screw was removed, a small plastic collar had to be removed using tweezers to access the touch sensor PCB
| [* red] Peeling back the Antenna from the double sick tape revealed the Main PCB, and that the Main PCB is held in place with a Phillips Head #00 Screw that was also marked on the PCB | |
| - | [* black] Once the Phillips Head screw was removed, a small plastic collar had to be removed using tweezers to access the touch sensor PCB |
| + | [* black] Once the Phillips Head screw was removed, a small plastic collar had to be removed using [product|IF145-020|tweezers] to access the touch sensor PCB |
crwdns2944171:0crwdnd2944171:0crwdnd2944171:0crwdnd2944171:0crwdne2944171:0