crwdns2933423:0crwdne2933423:0

Reemplazo del Taptic Engine del iPhone 13

crwdns2931527:0crwdnd2931527:0crwdnd2931527:0crwdnd2931527:0crwdne2931527:0

crwdns2935425:06crwdne2935425:0

crwdns2936315:0crwdne2936315:0
crwdns2936331:0crwdne2936331:0
crwdns2931653:06crwdne2931653:0
iPhone 13 Taptic Engine Replacement, Reassembly information: crwdns2935265:00crwdnd2935265:01crwdnd2935265:03crwdne2935265:0 iPhone 13 Taptic Engine Replacement, Reassembly information: crwdns2935265:00crwdnd2935265:02crwdnd2935265:03crwdne2935265:0 iPhone 13 Taptic Engine Replacement, Reassembly information: crwdns2935265:00crwdnd2935265:03crwdnd2935265:03crwdne2935265:0
Reassembly information
  • During reassembly, follow these steps to reconnect the Taptic Engine:

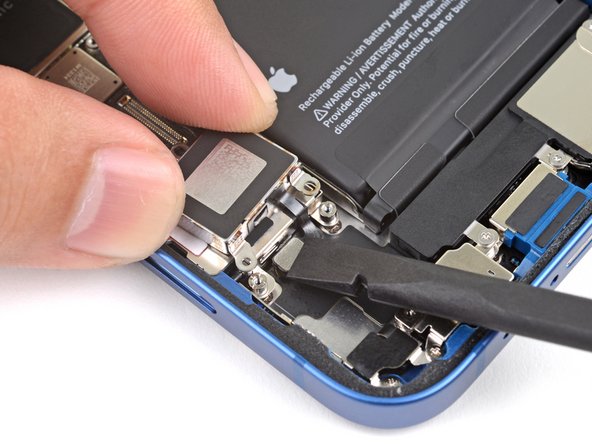
  • Place the Taptic Engine upside-down on the SIM card reader so that the Taptic Engine's ribbon cable faces its connector on the logic board.

  • Use the flat end of a spudger or the tip of your finger to reconnect the Taptic Engine press connector.

  • Flip the Taptic Engine back into its recess.

Durante el reensamblaje, sigue estos pasos para volver a conectar el Taptic Engine:

Coloca el Taptic Engine boca abajo en el lector de tarjetas SIM de modo que el cable plano del Taptic Engine quede frente a su conector en la placa lógica.

Usa el extremo plano de un spudger o la punta de tu dedo para volver a conectar el conector de presión del Taptic Engine.

Vuelve a colocar el Taptic Engine en su hueco.

crwdns2944171:0crwdnd2944171:0crwdnd2944171:0crwdnd2944171:0crwdne2944171:0