crwdns2933423:0crwdne2933423:0

iPad Pro 12.9インチ ディスプレイアセンブリの交換

crwdns2931529:0crwdnd2931529:0crwdnd2931529:0crwdnd2931529:04crwdnd2931529:0crwdne2931529:0

crwdns2936315:0crwdne2936315:0
crwdns2936323:0crwdne2936323:0
crwdns2931653:09crwdne2931653:0
iPad Pro 12.9" Display Assembly Replacement: crwdns2935265:00crwdnd2935265:01crwdnd2935265:03crwdne2935265:0 iPad Pro 12.9" Display Assembly Replacement: crwdns2935265:00crwdnd2935265:02crwdnd2935265:03crwdne2935265:0 iPad Pro 12.9" Display Assembly Replacement: crwdns2935265:00crwdnd2935265:03crwdnd2935265:03crwdne2935265:0
  • Lay a hot iOpener along the bottom left corner of the iPad, spanning from the opening pick to the home button.

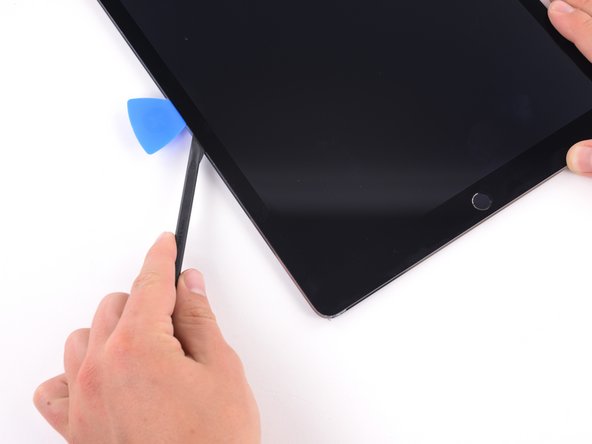
  • After letting the adhesive soften, insert an opening pick or halberd spudger into the gap next to the Smart Connector.

  • Be careful not to insert the halberd spudger more than 2 mm.

  • Use an opening pick or halberd spudger to slice the adhesive along the bottom left side of the iPad. If the slicing becomes difficult, reheat the edge and try again.

温めたiOpenerをiPadの左下コーナーに沿って当ててください。ホームボタンの下に開口ピックを挟みます。

接着剤が柔らかくなったら、開口ピックもしくはハルバードスパッジャーをSmart Connectorの隣の隙間に差し込みます。

ハルベルトスパッジャーを2mm以上差し込まないようにご注意ください。

開口ピックもしくはハルベルトスパッジャーを使ってiPadの左下側面に沿って接着剤を切開します。切開が困難な場合は、エッジを再度温めてから再試行してください。

crwdns2944171:0crwdnd2944171:0crwdnd2944171:0crwdnd2944171:0crwdne2944171:0