crwdns2933423:0crwdne2933423:0

Removing Dell Inspiron 1150 LCD from Display Assembly

crwdns2935425:01crwdne2935425:0

crwdns2936315:0crwdne2936315:0
crwdns2936321:0crwdne2936321:0
crwdns2931653:01crwdne2931653:0
Removing Dell Inspiron 1150 LCD from Display Assembly: crwdns2935265:00crwdnd2935265:01crwdnd2935265:03crwdne2935265:0 Removing Dell Inspiron 1150 LCD from Display Assembly: crwdns2935265:00crwdnd2935265:02crwdnd2935265:03crwdne2935265:0 Removing Dell Inspiron 1150 LCD from Display Assembly: crwdns2935265:00crwdnd2935265:03crwdnd2935265:03crwdne2935265:0
  • Remove the 2 screw covers and 3 rubber bumpers to reveal 5ea M2.5 x 5mm Philips screws

  • Remove the 5 screws and gently lift off the screen bezel (surround) to reveal the LCD panel and mounting screws which are along each side of the LCD

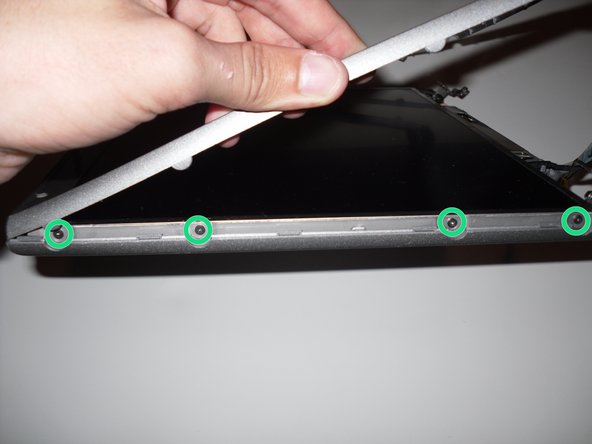
  • Remove 8ea M2 x 3mm (4 screws along each side)

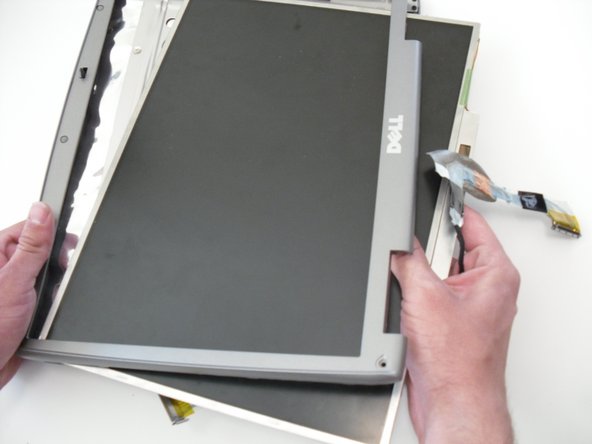
  • The LCD display can now be removed from the top cover of the laptop

  • The inverter PCB is located on the bottom edge of the LCD display panel and is easily removed

crwdns2935429:0crwdne2935429:0

crwdns2935429:0crwdne2935429:0

crwdns2935429:0crwdne2935429:0

crwdns2935429:0crwdne2935429:0

crwdns2935429:0crwdne2935429:0

crwdns2944171:0crwdnd2944171:0crwdnd2944171:0crwdnd2944171:0crwdne2944171:0