crwdns2933423:0crwdne2933423:0

Logitech MX Anywhere 3 배터리 교체

crwdns2931527:0crwdnd2931527:0crwdnd2931527:0crwdnd2931527:0crwdne2931527:0

crwdns2935425:07crwdne2935425:0

crwdns2936315:0crwdne2936315:0
crwdns2936325:0crwdne2936325:0
crwdns2931653:07crwdne2931653:0
Logitech MX Anywhere 3 Battery Replacement, Remove the battery: crwdns2935265:00crwdnd2935265:01crwdnd2935265:03crwdne2935265:0 Logitech MX Anywhere 3 Battery Replacement, Remove the battery: crwdns2935265:00crwdnd2935265:02crwdnd2935265:03crwdne2935265:0 Logitech MX Anywhere 3 Battery Replacement, Remove the battery: crwdns2935265:00crwdnd2935265:03crwdnd2935265:03crwdne2935265:0
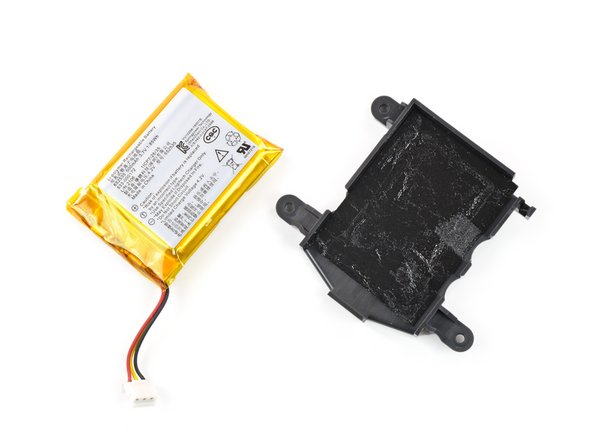
Remove the battery
  • Try not to bend, crease, deform, poke, or puncture the battery with your tool—a damaged battery is a potential fire hazard.

  • Insert the flat end of a spudger between the battery and its housing through one of the cutouts.

  • Pull up to peel the battery away from the adhesive.

  • Remove the battery.

  • To install a new battery:

  • Use a spudger or your fingers to peel any old adhesive off of the battery housing. The old adhesive shouldn't leave any residue.

  • If your new battery doesn't come with preinstalled adhesive, place a couple strips of double-sided tape into the battery housing.

  • Orient your new battery so its cables route through the cutout in the corner of the housing. Press the battery firmly into place to secure it.

배터리가 손상되면 화재의 위험이 있으므로 도구로 배터리를 구부리거나 구기거나 변형하거나 찌르거나 구멍을 뚫지 마세요.

스퍼저의 납작한 끝을 구멍 중 하나를 통해 배터리와 하우징 사이에 끼우세요.

위로 당겨서 배터리를 접착제에서 떼어내세요.

배터리를 분리하세요.

새 배터리를 설치하려면:

스퍼저나 손가락을 사용하여 배터리 하우징에서 오래된 접착제를 벗겨내세요. 기존 접착제는 잔여물이 남지 않아야 합니다.

새 배터리에 접착제가 미리 설치되어 있지 않은 경우 양면 테이프 두어 개를 배터리 하우징에 붙이세요.

새 배터리의 케이블이 하우징 모서리에 있는 구멍을 통과하도록 방향을 맞추세요. 배터리를 제자리에 단단히 눌러 고정하세요.

crwdns2944171:0crwdnd2944171:0crwdnd2944171:0crwdnd2944171:0crwdne2944171:0