crwdns2933423:0crwdne2933423:0

Microsoft Surface Pro 6 마더보드 어셈블리 교체

crwdns2931529:0crwdnd2931529:0crwdnd2931529:0crwdnd2931529:02crwdnd2931529:0crwdne2931529:0

crwdns2936315:0crwdne2936315:0
crwdns2936325:0crwdne2936325:0
crwdns2931653:016crwdne2931653:0
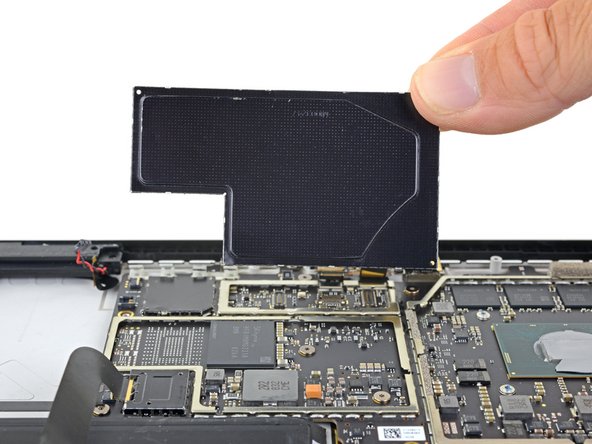
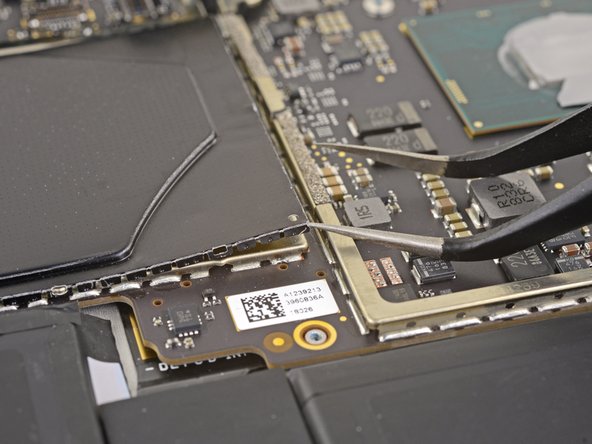
Microsoft Surface Pro 6 Motherboard Assembly Replacement, Remove the two large EMI shields: crwdns2935265:00crwdnd2935265:01crwdnd2935265:03crwdne2935265:0 Microsoft Surface Pro 6 Motherboard Assembly Replacement, Remove the two large EMI shields: crwdns2935265:00crwdnd2935265:02crwdnd2935265:03crwdne2935265:0 Microsoft Surface Pro 6 Motherboard Assembly Replacement, Remove the two large EMI shields: crwdns2935265:00crwdnd2935265:03crwdnd2935265:03crwdne2935265:0
Remove the two large EMI shields
  • Insert one point of a pair of pointed tweezers into a gap in the corner of the left-most of the remaining large EMI shields.

  • Use the tweezers to pry the EMI shield away from the motherboard as much as you can without bending it.

  • Repeat this procedure at different points around the shield until it is free. Remove the shield.

  • Try not to deform the shield too much—you will need to reinstall it during reassembly.

  • Take care not to puncture the battery with the tweezers while working on this shield.

핀셋의 한 뾰족한 부분을 MicroSD 카드 리더 커넥터를 덮고 있는 나머지 대형 EMI 실드의 맨-왼편 모서리의 틈에 끼우세요.

핀셋을 사용하여 디스플레이를 구부리지 않으며 디스플에이에서 최대한 멀찍이 EMI 실드를 들어 올리세요.

실드가 자유롭게 분리될 때까지 실드 주변의 다른 부분에도 이 절차를 반복하세요. 실드를 분리하세요.

실드를 너무 많이 변형하지 마세요—재조립할 때 실드를 다시 설치해야 합니다.

이 실드에 작업하는 동안 핀셋으로 배터리에 구멍을 내지 않도록 주의하세요.

crwdns2944171:0crwdnd2944171:0crwdnd2944171:0crwdnd2944171:0crwdne2944171:0