crwdns2933423:0crwdne2933423:0

左側スピーカーの取り外し

crwdns2931529:0crwdnd2931529:0crwdnd2931529:0crwdnd2931529:03crwdnd2931529:0crwdne2931529:0

crwdns2936315:0crwdne2936315:0
crwdns2936323:0crwdne2936323:0
crwdns2931653:02crwdne2931653:0
Left Speaker Removal: crwdns2935265:00crwdnd2935265:01crwdnd2935265:03crwdne2935265:0 Left Speaker Removal: crwdns2935265:00crwdnd2935265:02crwdnd2935265:03crwdne2935265:0 Left Speaker Removal: crwdns2935265:00crwdnd2935265:03crwdnd2935265:03crwdne2935265:0
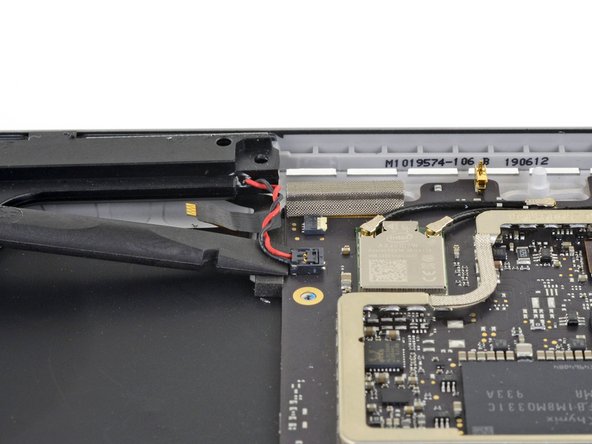
  • Gently slide the flat end of a spudger between the speaker wires and the motherboard until it is resting against the connector.

  • Carefully pry straight up on the connector to disconnect it from the motherboard.

  • Be gentle—the speaker wires are delicate.

  • During reassembly, place the new speaker wire harness on top of the connector on the motherboard and gently press it straight down with your finger to reconnect it.

スピーカワイヤとマザーボードの間にスパッジャーの平面側先端を差し込み、コネクタに当たるまでゆっくりと滑らせてください。

マザーボードからコネクタをまっすぐ跳ね上げて、接続を外します。

作業は慎重に行なってください。スピーカーワイヤはデリケートです。

再組み立ての際、新しいスピーカーワイヤーハーネスをマザーボード上のコネクタの上に置き、指で軽く押し込んで、再接続してください。

crwdns2944171:0crwdnd2944171:0crwdnd2944171:0crwdnd2944171:0crwdne2944171:0