crwdns2933423:0crwdne2933423:0

Microsoft Surface Laptop 3 15" Akku tauschen

crwdns2931527:0crwdnd2931527:0crwdnd2931527:0crwdnd2931527:0crwdne2931527:0

crwdns2936315:0crwdne2936315:0
crwdns2936319:0crwdne2936319:0
crwdns2931653:05crwdne2931653:0
Microsoft Surface Laptop 3 15" Battery Replacement: crwdns2935265:00crwdnd2935265:01crwdnd2935265:03crwdne2935265:0 Microsoft Surface Laptop 3 15" Battery Replacement: crwdns2935265:00crwdnd2935265:02crwdnd2935265:03crwdne2935265:0 Microsoft Surface Laptop 3 15" Battery Replacement: crwdns2935265:00crwdnd2935265:03crwdnd2935265:03crwdne2935265:0
  • Take care not to puncture or bend the battery with your tools—a punctured or bent battery may leak dangerous chemicals or cause a thermal event.

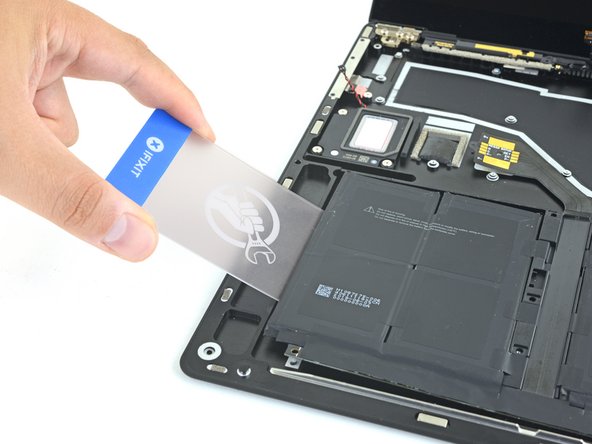
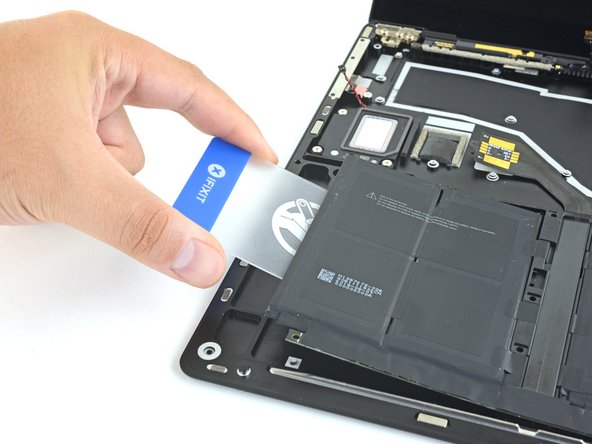
  • Slide a plastic card underneath the far left battery cell group to slice through the adhesive holding it to the case.

  • If you encounter significant resistance at any point during this procedure, pause and apply more adhesive remover. Wait for it to soak into the adhesive, and try again.

  • Wiggle the card from side to side as you insert it under the battery cells to fully separate all adhesive holding them in place.

  • Leave the plastic card temporarily underneath the cell to prevent it from re-adhering while you continue.

Achte darauf, dass der Akku nicht angestochen oder verformt wird, es können sonst gefährliche Chemikalien austreten oder er kann in Brand geraten.

Schiebe eine Kunststoffkarte unter die Akkuzellengruppe ganz links und trenne den Kleber auf, mit dem sie am Gehäuse befestigt sind.

Wenn du im Verlauf der Prozedur irgendwann stärkeren Widerstand spürst, dann halte an und gib noch etwas Klebstoffentferner dran. Lasse ihn etwas einwirken und fahre dann fort.

Wackle beim Auftrennen mit der Karte etwas hin und her, um den Kleber unter den Akkuzellen ganz aufzutrennen.

Lasse die Kunststoffkarte zeitweise unter dem Akku stecken, damit sich der Kleber nicht wieder verbinden kann.

crwdns2944171:0crwdnd2944171:0crwdnd2944171:0crwdnd2944171:0crwdne2944171:0