crwdns2933423:0crwdne2933423:0

4. X Mount

crwdns2936315:0crwdne2936315:0
crwdns2936319:0crwdne2936319:0
crwdns2931653:05crwdne2931653:0
4. X Mount, X 2020 Extrusion: crwdns2935265:00crwdnd2935265:01crwdnd2935265:03crwdne2935265:0 4. X Mount, X 2020 Extrusion: crwdns2935265:00crwdnd2935265:02crwdnd2935265:03crwdne2935265:0 4. X Mount, X 2020 Extrusion: crwdns2935265:00crwdnd2935265:03crwdnd2935265:03crwdne2935265:0
X 2020 Extrusion
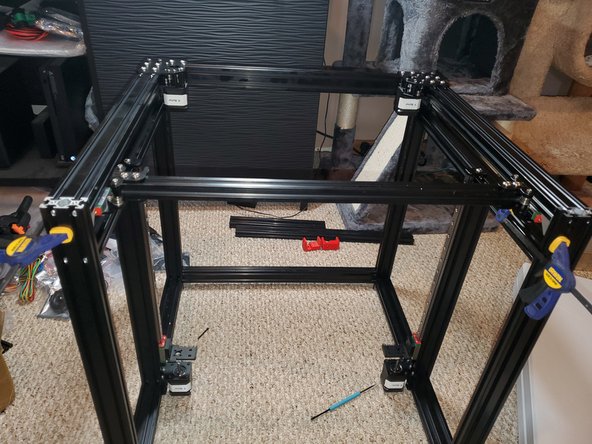
  • Using 2x M5x8mm screws secure an internal corner clamp into the channel next to the Y linear rail at the front of the frame for both sides. The purpose of this is to use the corner as an alignment block.

  • Slide the Y MGN mount and using a compression clamp clamp the front mount to the front of the printer as seen in the picture. Do this for both Left and Right sides

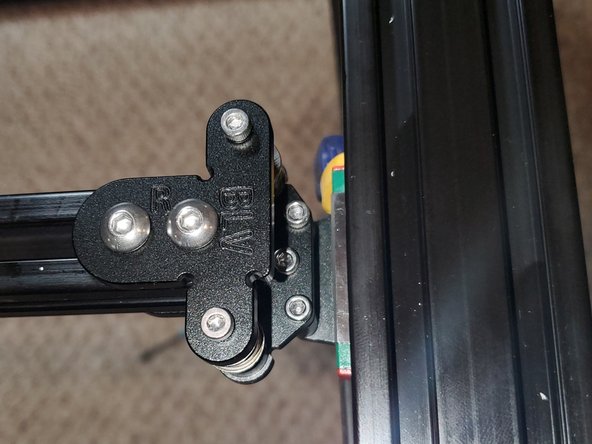
  • Once both sides are clamped tighten the 6x M3x18 socket head screws, the 4x M3x30 button head screws and the 8x M5x8mm button head screws

  • When you remove the clamps measure from the vertical 2040 to the face of 460mm 2020 and you should get the same dimension(within 1mm). If you do, remove the clamps and move on. If the dimensions are not within 1mm check the alignment of the 460mm 2020 in the X mount.

crwdns2935429:0crwdne2935429:0

crwdns2935429:0crwdne2935429:0

crwdns2935429:0crwdne2935429:0

crwdns2935429:0crwdne2935429:0

crwdns2944171:0crwdnd2944171:0crwdnd2944171:0crwdnd2944171:0crwdne2944171:0