crwdns2931527:0crwdnd2931527:0crwdnd2931527:0crwdnd2931527:0crwdne2931527:0
crwdns2935425:04crwdne2935425:0
crwdns2931653:04crwdne2931653:0

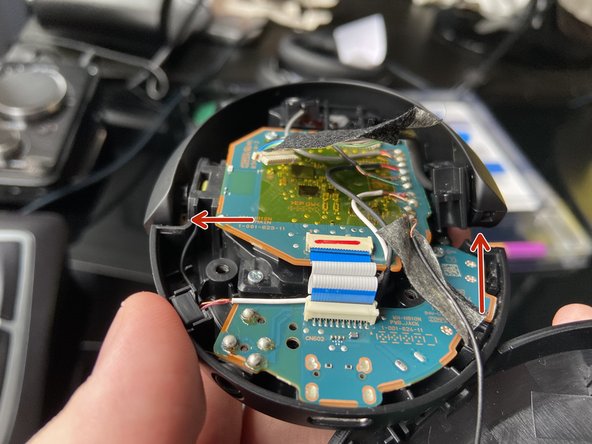


Tilt and push the Left Speaker hinge
-
On the rear hinge, gently lift up the hinge as much as is comfortable while at the same time, gently tugging on the front hinge outwards. You should be able to create a small shift in where the hinge is sitting, which is important for the next part.
crwdns2944171:0crwdnd2944171:0crwdnd2944171:0crwdnd2944171:0crwdne2944171:0