crwdns2931527:0crwdnd2931527:0crwdnd2931527:0crwdnd2931527:0crwdne2931527:0
crwdns2935425:08crwdne2935425:0
crwdns2931653:08crwdne2931653:0

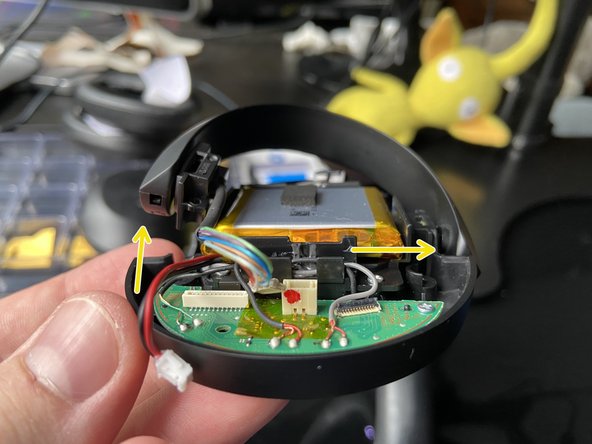


Tilt and push the Right Speaker hinge
-
On the rear hinge, gently lift up the hinge as much as is comfortable while at the same time, gently tugging on the front hinge outwards.
-
You should be able to create a small shift in where the hinge is sitting, which is important for the next part.
crwdns2944171:0crwdnd2944171:0crwdnd2944171:0crwdnd2944171:0crwdne2944171:0