crwdns2933423:0crwdne2933423:0

iPad mini 5 Wi-Fi ホームボタンアセンブリの交換

crwdns2931527:0crwdnd2931527:0crwdnd2931527:0crwdnd2931527:0crwdne2931527:0

crwdns2935425:09crwdne2935425:0

crwdns2936315:0crwdne2936315:0
crwdns2936323:0crwdne2936323:0
crwdns2931653:09crwdne2931653:0
iPad mini 5 Wi-Fi Home Button Assembly Replacement: crwdns2935265:00crwdnd2935265:01crwdnd2935265:03crwdne2935265:0 iPad mini 5 Wi-Fi Home Button Assembly Replacement: crwdns2935265:00crwdnd2935265:02crwdnd2935265:03crwdne2935265:0 iPad mini 5 Wi-Fi Home Button Assembly Replacement: crwdns2935265:00crwdnd2935265:03crwdnd2935265:03crwdne2935265:0
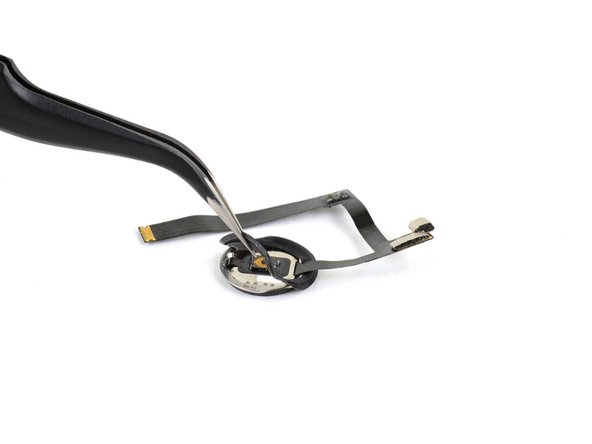
  • Lift and remove the home button assembly.

  • You can reuse the home button gasket if it's sufficiently tacky. Otherwise, replace the black rubber gasket:

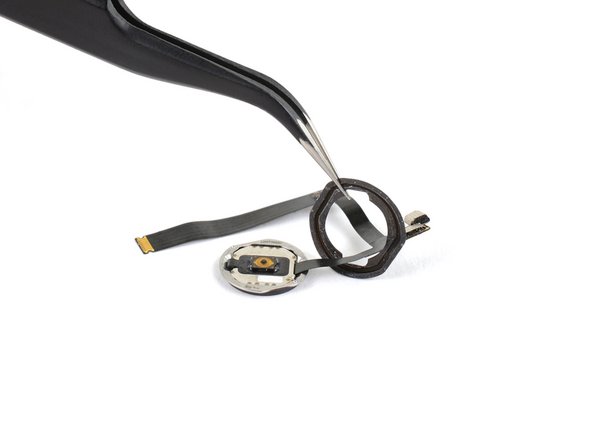
  • Peel the gasket off of the home button. Then, thread it past the cable to remove it.

  • Apply a replacement gasket to the home button.

  • The iPad mini 4's replacement gasket fits on the iPad mini 5, but it is slightly larger. Make sure it doesn't overlap the screen's adhesive so that the screen can be properly adhered to the frame.

  • To install the home button:

  • Rotate the home button so that the home button cable sits where it was before disassembly. Make sure the home button cable can be inserted into its ZIF connector.

  • Center the home button so that it fits into its slot in the screen. Then, press down firmly on the gasket to adhere it to the screen.

ホームボタンアセンブリを持ち上げて取り出します。

ホームボタンのパッキンは、十分な接着性があれば、再利用できます。それ以外の場合は、黒いゴムパッキンを交換してください。

ホームボタンからパッキンをはがします。その後、ケーブルの先を通して外します。

ホームボタンに交換用ガスケットを貼ります。

iPad mini 4の交換用ガスケットはiPad mini 5に適合しますが、若干大きくなっています。スクリーンがフレームに正しく接着されるように、スクリーンの接着剤と重ならないように注意してください。

ホームボタンのインストール方法

ホームボタンを回転させ、ホームボタンケーブルが分解前の位置に収まるようにします。ホームボタンケーブルがZIFコネクターに装着できることを確認します。

ホームボタン中央がスクリーンの溝に収まるように、配置します。次に、ガスケットをしっかりと押してスクリーンに密着させます。

crwdns2944171:0crwdnd2944171:0crwdnd2944171:0crwdnd2944171:0crwdne2944171:0