crwdns2933423:0crwdne2933423:0

Screen Removal

crwdns2931529:0crwdnd2931529:0crwdnd2931529:0crwdnd2931529:08crwdnd2931529:0crwdne2931529:0

crwdns2935425:09crwdne2935425:0

crwdns2936315:0crwdne2936315:0
crwdns2936325:0crwdne2936325:0
crwdns2931653:09crwdne2931653:0
Screen Removal, Screen reassembly information: crwdns2935265:00crwdnd2935265:01crwdnd2935265:03crwdne2935265:0 Screen Removal, Screen reassembly information: crwdns2935265:00crwdnd2935265:02crwdnd2935265:03crwdne2935265:0 Screen Removal, Screen reassembly information: crwdns2935265:00crwdnd2935265:03crwdnd2935265:03crwdne2935265:0
Screen reassembly information
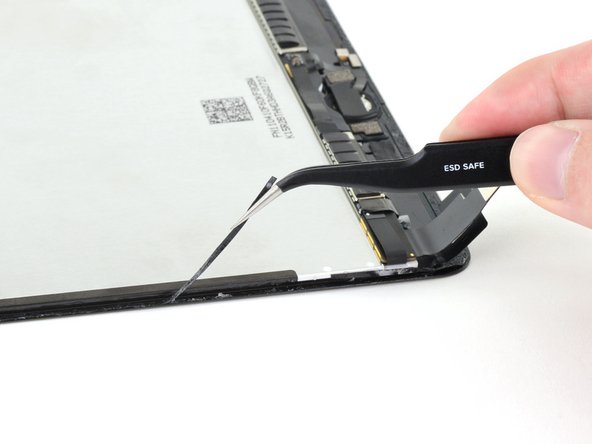
  • During reassembly, remove any remaining adhesive and residue from the perimeters of the frame and the screen. Then, apply new adhesive to secure the screen to the frame.

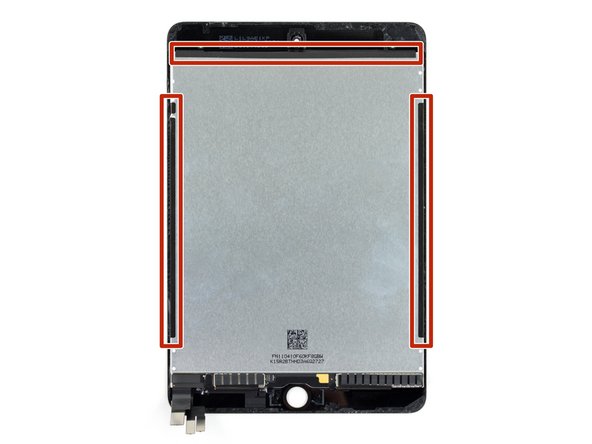
  • Don't remove the black tape on the left, right, and upper edges of the display. These hold the display to the front glass.

  • Follow this guide if you are using a pre-cut adhesive card. Follow this guide if you are using custom-cut adhesives.

crwdns2935429:0crwdne2935429:0

crwdns2935429:0crwdne2935429:0

crwdns2935429:0crwdne2935429:0

crwdns2944171:0crwdnd2944171:0crwdnd2944171:0crwdnd2944171:0crwdne2944171:0