crwdns2933423:0crwdne2933423:0

スクリーンの取り外し

crwdns2931529:0crwdnd2931529:0crwdnd2931529:0crwdnd2931529:08crwdnd2931529:0crwdne2931529:0

crwdns2935425:09crwdne2935425:0

crwdns2936315:0crwdne2936315:0
crwdns2936323:0crwdne2936323:0
crwdns2931653:09crwdne2931653:0
Screen Removal, Screen reassembly information: crwdns2935265:00crwdnd2935265:01crwdnd2935265:03crwdne2935265:0 Screen Removal, Screen reassembly information: crwdns2935265:00crwdnd2935265:02crwdnd2935265:03crwdne2935265:0 Screen Removal, Screen reassembly information: crwdns2935265:00crwdnd2935265:03crwdnd2935265:03crwdne2935265:0
Screen reassembly information
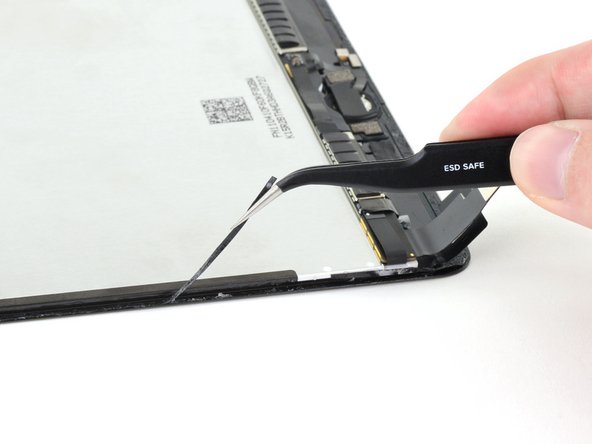
  • During reassembly, remove any remaining adhesive and residue from the perimeters of the frame and the screen. Then, apply new adhesive to secure the screen to the frame.

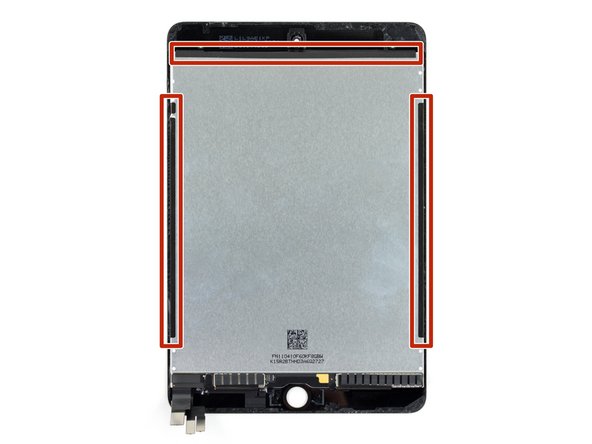
  • Don't remove the black tape on the left, right, and upper edges of the display. These hold the display to the front glass.

  • Follow this guide if you are using a pre-cut adhesive card. Follow this guide if you are using custom-cut adhesives.

再組み立ての際、フレームとスクリーンの周囲に残っている接着剤と残留物を取り除いてください。その後、新しい接着剤を装着してから、スクリーンをフレームに固定します。

ディスプレイの左端、右端、上端にある黒いテープは剥がさないでください。これらは、ディスプレイをフロントガラスに固定しているものです。

プレカットされた接着カードを使用する場合は、このガイドを参照ください。カスタムカットされた粘着剤を使用する場合は、このガイドに従ってください。

crwdns2944171:0crwdnd2944171:0crwdnd2944171:0crwdnd2944171:0crwdne2944171:0