crwdns2933423:0crwdne2933423:0

Extracción de la pantalla

crwdns2931529:0crwdnd2931529:0crwdnd2931529:0crwdnd2931529:08crwdnd2931529:0crwdne2931529:0

crwdns2935425:09crwdne2935425:0

crwdns2936315:0crwdne2936315:0
crwdns2936331:0crwdne2936331:0
crwdns2931653:09crwdne2931653:0
Screen Removal, Screen reassembly information: crwdns2935265:00crwdnd2935265:01crwdnd2935265:03crwdne2935265:0 Screen Removal, Screen reassembly information: crwdns2935265:00crwdnd2935265:02crwdnd2935265:03crwdne2935265:0 Screen Removal, Screen reassembly information: crwdns2935265:00crwdnd2935265:03crwdnd2935265:03crwdne2935265:0
Screen reassembly information
  • During reassembly, remove any remaining adhesive and residue from the perimeters of the frame and the screen. Then, apply new adhesive to secure the screen to the frame.

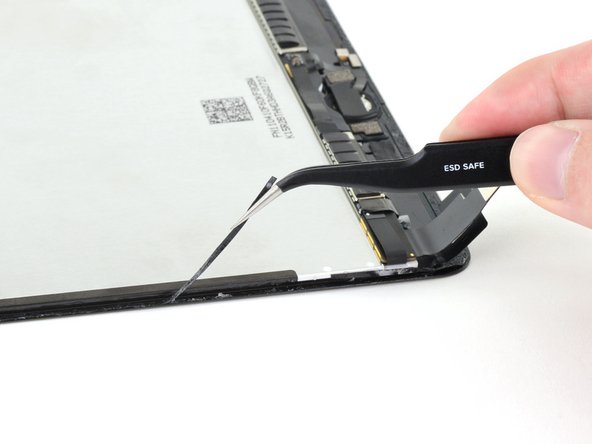
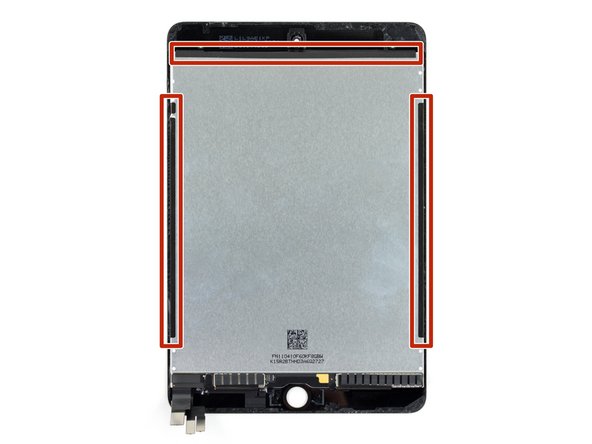
  • Don't remove the black tape on the left, right, and upper edges of the display. These hold the display to the front glass.

  • Follow this guide if you are using a pre-cut adhesive card. Follow this guide if you are using custom-cut adhesives.

Durante el reensamblaje, retira cualquier resto de adhesivo y residuos de los perímetros del marco y de la pantalla. A continuación, aplica nuevo adhesivo para fijar la pantalla al marco.

No retires la cinta adhesiva negra de los bordes izquierdo, derecho y superior de la pantalla. Estas sujetan la pantalla al cristal frontal.

Sigue esta guía si estás usando una tarjeta adhesiva precortada. Sigue esta guía si estás usando adhesivos cortados a medida.

crwdns2944171:0crwdnd2944171:0crwdnd2944171:0crwdnd2944171:0crwdne2944171:0