crwdns2933423:0crwdne2933423:0

Display ausbauen

crwdns2931529:0crwdnd2931529:0crwdnd2931529:0crwdnd2931529:08crwdnd2931529:0crwdne2931529:0

crwdns2935425:09crwdne2935425:0

crwdns2936315:0crwdne2936315:0
crwdns2936319:0crwdne2936319:0
crwdns2931653:09crwdne2931653:0
Screen Removal, Screen reassembly information: crwdns2935265:00crwdnd2935265:01crwdnd2935265:03crwdne2935265:0 Screen Removal, Screen reassembly information: crwdns2935265:00crwdnd2935265:02crwdnd2935265:03crwdne2935265:0 Screen Removal, Screen reassembly information: crwdns2935265:00crwdnd2935265:03crwdnd2935265:03crwdne2935265:0
Screen reassembly information
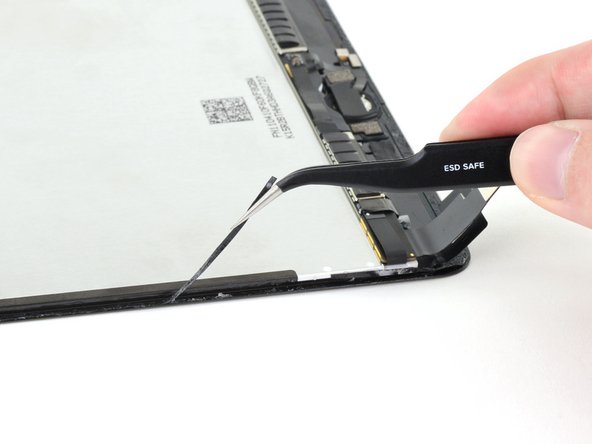
  • During reassembly, remove any remaining adhesive and residue from the perimeters of the frame and the screen. Then, apply new adhesive to secure the screen to the frame.

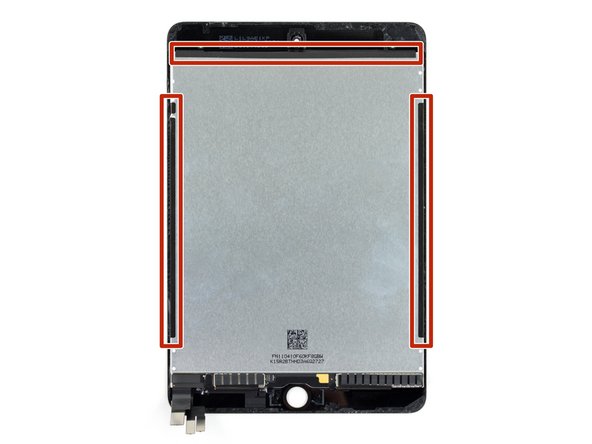
  • Don't remove the black tape on the left, right, and upper edges of the display. These hold the display to the front glass.

  • Follow this guide if you are using a pre-cut adhesive card. Follow this guide if you are using custom-cut adhesives.

Beim Wiederzusammenbau musst du alle Klebereste und Rückstände von den Rändern des Rahmens und des Displays reinigen. Trage dann neuen Kleber auf, um das Display am Rahmen zu befestigen.

Entferne das schwarze Klebeband an den linken, rechten und oberen Kanten des Displays nicht. Damit wird das Display an der Glasfront befestigt.

Folge dieser Anleitung, wenn du eine vorgestanzte Klebekarte benutzt. Folge dieser Anleitung, wenn du speziell zugeschnittene Klebestreifen benutzt.

crwdns2944171:0crwdnd2944171:0crwdnd2944171:0crwdnd2944171:0crwdne2944171:0