crwdns2933423:0crwdne2933423:0

Opening the Jura Z series housing

crwdns2931533:0crwdnd2931533:0crwdnd2931533:0crwdnd2931533:09crwdnd2931533:0crwdne2931533:0

crwdns2936319:0crwdne2936319:0
crwdns2936315:0crwdne2936315:0
crwdns2931653:06crwdne2931653:0
Jura Z Modelle öffnen: crwdns2935265:00crwdnd2935265:01crwdnd2935265:03crwdne2935265:0 Jura Z Modelle öffnen: crwdns2935265:00crwdnd2935265:02crwdnd2935265:03crwdne2935265:0 Jura Z Modelle öffnen: crwdns2935265:00crwdnd2935265:03crwdnd2935265:03crwdne2935265:0
  • In diesem Schritt sollst du die Schrauben des linkenSeitenteils entfernen, das Seitenteil selbst wird aber erst nach dem Ausbau der oberen Abdeckung entnommen.

  • Drehe die Torx T15 Schraube an der Vorderwand des Seitenteils heraus.

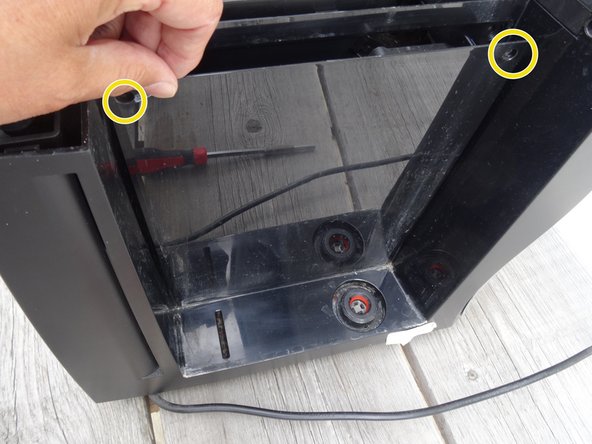
  • Im Seitenteil befindet sich ein Deckel über der Brühgruppe. Der Deckel ist oben mit zwei Ovalkopfschrauben befestigt. Drehe sie heraus und entnimm den Deckel.

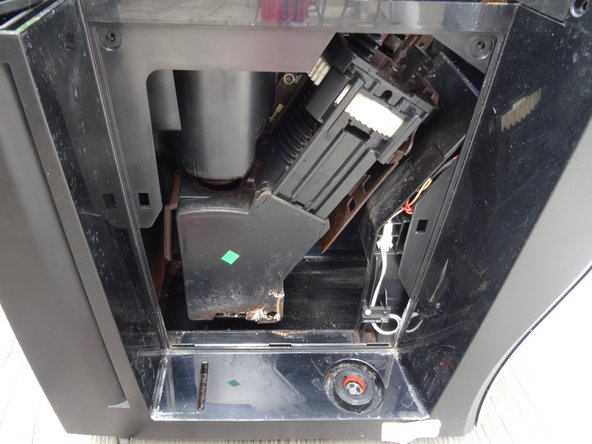
  • Die Brühgruppe wird sichtbar.

In this step, you should remove the screws of the left side panel. The side panel can only be removed after removing the top cover.

Remove the Torx T15 screw on the front wall of the side panel.

In the side part there is a lid over the brew group. The lid is fastened at the top with two oval head screws. Remove those to remove the lid.

With the cover removed the brew group becomes visible

crwdns2944171:0crwdnd2944171:0crwdnd2944171:0crwdnd2944171:0crwdne2944171:0