crwdns2933423:0crwdne2933423:0

HTC Vive Cosmos LCD 和主板组件更换

crwdns2931529:0crwdnd2931529:0crwdnd2931529:0crwdnd2931529:05crwdnd2931529:0crwdne2931529:0

crwdns2936315:0crwdne2936315:0
crwdns2936311:0crwdne2936311:0
crwdns2931653:014crwdne2931653:0
HTC Vive Cosmos LCD and Motherboard Assembly Replacement: crwdns2935265:00crwdnd2935265:01crwdnd2935265:03crwdne2935265:0 HTC Vive Cosmos LCD and Motherboard Assembly Replacement: crwdns2935265:00crwdnd2935265:02crwdnd2935265:03crwdne2935265:0 HTC Vive Cosmos LCD and Motherboard Assembly Replacement: crwdns2935265:00crwdnd2935265:03crwdnd2935265:03crwdne2935265:0
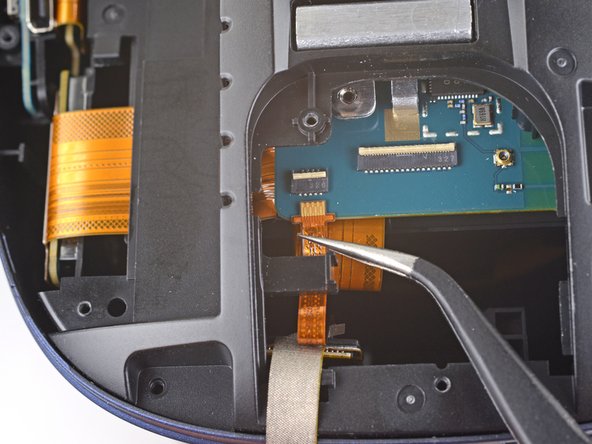
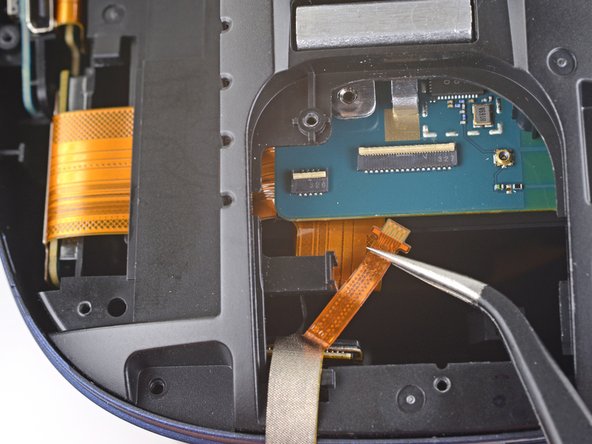
  • Carefully slide the microphone connector cable straight out of its socket on the motherboard.

  • With the cable out of its socket, slide the cable toward the bottom of the Vive and out of its clip on the LCD and motherboard assembly.

  • Take care not to crease or tear the cable while you're moving it.

小心地将麦克风接口电缆从主板上的插座中直接滑出。

将电缆从插座中拔出,将电缆滑向 Vive 底部并从 LCD 和主板组件上的夹子中滑出。

移动电缆时,请注意不要弄皱或撕裂电缆。

crwdns2944171:0crwdnd2944171:0crwdnd2944171:0crwdnd2944171:0crwdne2944171:0