crwdns2933423:0crwdne2933423:0

Sostituzione gruppo LCD e scheda madre HTC Vive Cosmos

crwdns2931529:0crwdnd2931529:0crwdnd2931529:0crwdnd2931529:05crwdnd2931529:0crwdne2931529:0

crwdns2936315:0crwdne2936315:0
crwdns2936321:0crwdne2936321:0
crwdns2931653:014crwdne2931653:0
HTC Vive Cosmos LCD and Motherboard Assembly Replacement: crwdns2935265:00crwdnd2935265:01crwdnd2935265:03crwdne2935265:0 HTC Vive Cosmos LCD and Motherboard Assembly Replacement: crwdns2935265:00crwdnd2935265:02crwdnd2935265:03crwdne2935265:0 HTC Vive Cosmos LCD and Motherboard Assembly Replacement: crwdns2935265:00crwdnd2935265:03crwdnd2935265:03crwdne2935265:0
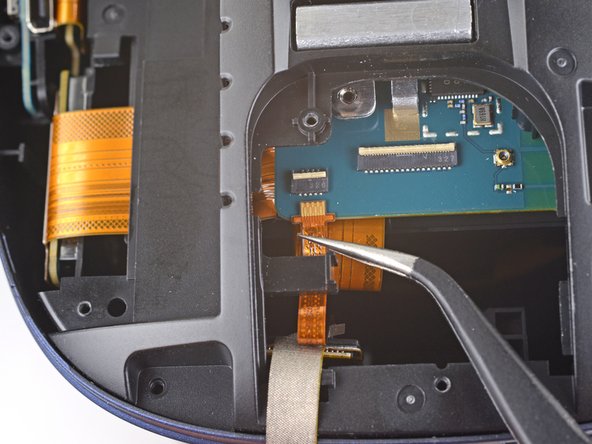
  • Carefully slide the microphone connector cable straight out of its socket on the motherboard.

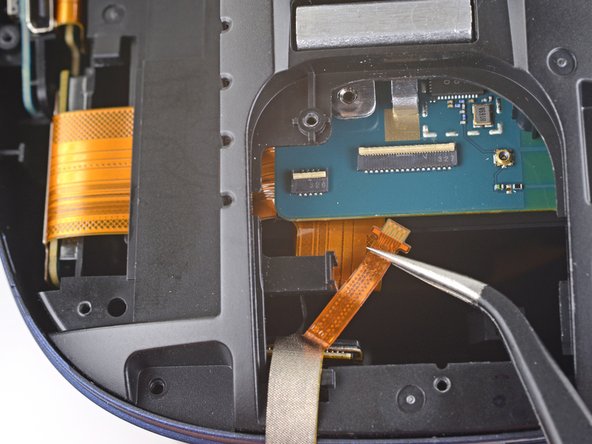
  • With the cable out of its socket, slide the cable toward the bottom of the Vive and out of its clip on the LCD and motherboard assembly.

  • Take care not to crease or tear the cable while you're moving it.

Fai scorrere con attenzione il cavo del connettore del microfono direttamente via dalla sua presa sulla scheda madre.

Dopo aver rimosso il cavo dalla presa, fallo scorrere verso la parte inferiore del Vive e via dalla clip sul gruppo LCD e scheda madre.

Fai attenzione a non piegare o strappare il cavo mentre lo muovi.

crwdns2944171:0crwdnd2944171:0crwdnd2944171:0crwdnd2944171:0crwdne2944171:0