crwdns2933423:0crwdne2933423:0

Reemplazo de ensamblaje de placa madre y LCD de HTC Vive Cosmos

crwdns2931529:0crwdnd2931529:0crwdnd2931529:0crwdnd2931529:05crwdnd2931529:0crwdne2931529:0

crwdns2936315:0crwdne2936315:0
crwdns2936331:0crwdne2936331:0
crwdns2931653:014crwdne2931653:0
HTC Vive Cosmos LCD and Motherboard Assembly Replacement: crwdns2935265:00crwdnd2935265:01crwdnd2935265:03crwdne2935265:0 HTC Vive Cosmos LCD and Motherboard Assembly Replacement: crwdns2935265:00crwdnd2935265:02crwdnd2935265:03crwdne2935265:0 HTC Vive Cosmos LCD and Motherboard Assembly Replacement: crwdns2935265:00crwdnd2935265:03crwdnd2935265:03crwdne2935265:0
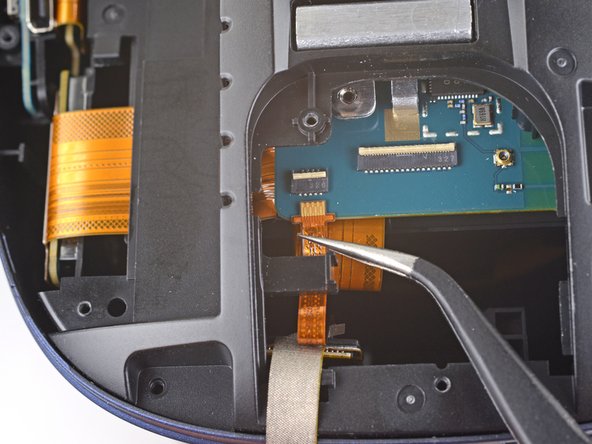
  • Carefully slide the microphone connector cable straight out of its socket on the motherboard.

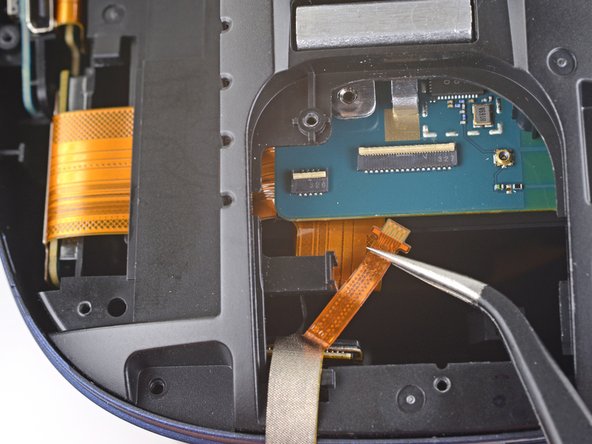
  • With the cable out of its socket, slide the cable toward the bottom of the Vive and out of its clip on the LCD and motherboard assembly.

  • Take care not to crease or tear the cable while you're moving it.

Desliza con cuidado el cable del conector del micrófono para sacarlo de su zócalo en la placa madre.

Con el cable fuera de su zócalo, desliza el cable hacia la parte inferior del Vive y fuera de su clip en el ensamblaje de la pantalla LCD y la placa madre.

Ten cuidado de no arrugarse o romperse el cable mientras lo mueves.

crwdns2944171:0crwdnd2944171:0crwdnd2944171:0crwdnd2944171:0crwdne2944171:0