crwdns2933423:0crwdne2933423:0

Sostituzione gruppo LCD e scheda madre HTC Vive Cosmos

crwdns2931529:0crwdnd2931529:0crwdnd2931529:0crwdnd2931529:05crwdnd2931529:0crwdne2931529:0

crwdns2936315:0crwdne2936315:0
crwdns2936321:0crwdne2936321:0
crwdns2931653:010crwdne2931653:0
HTC Vive Cosmos LCD and Motherboard Assembly Replacement: crwdns2935265:00crwdnd2935265:01crwdnd2935265:03crwdne2935265:0 HTC Vive Cosmos LCD and Motherboard Assembly Replacement: crwdns2935265:00crwdnd2935265:02crwdnd2935265:03crwdne2935265:0 HTC Vive Cosmos LCD and Motherboard Assembly Replacement: crwdns2935265:00crwdnd2935265:03crwdnd2935265:03crwdne2935265:0
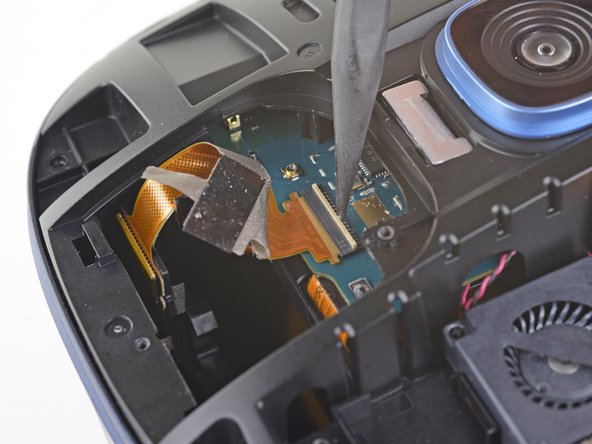
  • Use the point of a spudger to flip up the small locking flap securing the right camera cable ZIF connector.

  • Carefully slide the camera connector cable straight out of its socket on the motherboard.

Usa la punta di uno spudger per capovolgere la piccola aletta di bloccaggio che tiene fermo il connettore ZIF del cavo della fotocamera destra.

Fai scorrere con attenzione il cavo del connettore della fotocamera direttamente via dalla sua presa sulla scheda madre.

crwdns2944171:0crwdnd2944171:0crwdnd2944171:0crwdnd2944171:0crwdne2944171:0