crwdns2933423:0crwdne2933423:0

更换 Google Stadia 手柄主板组件

crwdns2931529:0crwdnd2931529:0crwdnd2931529:0crwdnd2931529:05crwdnd2931529:0crwdne2931529:0

crwdns2936315:0crwdne2936315:0
crwdns2936311:0crwdne2936311:0
crwdns2931653:04crwdne2931653:0
Google Stadia Controller Motherboard Assembly Replacement: crwdns2935265:00crwdnd2935265:01crwdnd2935265:03crwdne2935265:0 Google Stadia Controller Motherboard Assembly Replacement: crwdns2935265:00crwdnd2935265:02crwdnd2935265:03crwdne2935265:0 Google Stadia Controller Motherboard Assembly Replacement: crwdns2935265:00crwdnd2935265:03crwdnd2935265:03crwdne2935265:0
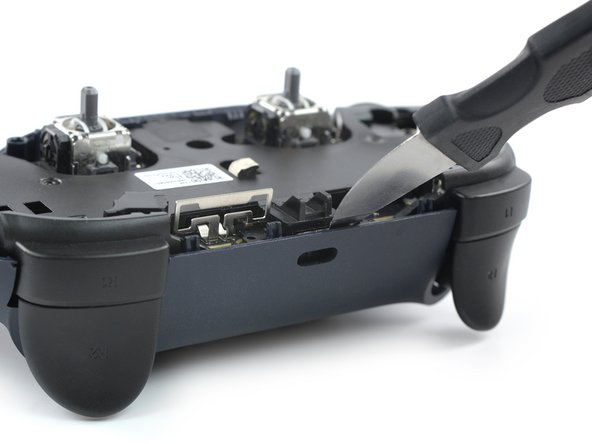
  • Insert a Jimmy at the top edge of the Google Stadia controller just above the charging port.

  • Pry up the top edge of the motherboard assembly by tilting the Jimmy downwards.

  • The charging port is clamped into an opening in the rear cover of the stadia controller. Make sure the charging port is not stuck in its recess during the prying procedure.

  • During reassembly make sure the charging port snaps back into its recess.

将 Jimmy 插入 Google Stadia 手柄顶部边缘的充电端口上方。

向下倾斜Jimmy,撬起主板组件的顶部边缘。

充电端口夹在 Stadia 手柄后盖的开口中。 确保在撬动过程中充电端口没有卡在凹槽中。

重新组装时,确保充电端口卡回凹槽。

crwdns2944171:0crwdnd2944171:0crwdnd2944171:0crwdnd2944171:0crwdne2944171:0