crwdns2933423:0crwdne2933423:0

左Joy-Con充电导轨的更换

crwdns2935425:016crwdne2935425:0

crwdns2936315:0crwdne2936315:0
crwdns2936311:0crwdne2936311:0
crwdns2931653:016crwdne2931653:0
Left Joy-Con Charging Rail Replacement: crwdns2935265:00crwdnd2935265:01crwdnd2935265:03crwdne2935265:0 Left Joy-Con Charging Rail Replacement: crwdns2935265:00crwdnd2935265:02crwdnd2935265:03crwdne2935265:0 Left Joy-Con Charging Rail Replacement: crwdns2935265:00crwdnd2935265:03crwdnd2935265:03crwdne2935265:0
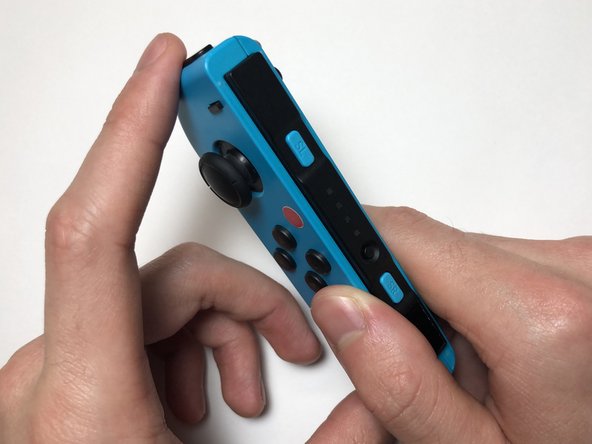
  • Align the charging rail into the notch on the left side of the Joy-Con.

  • Apply even pressure on both sides of the Joy-Con until the two shells click together.

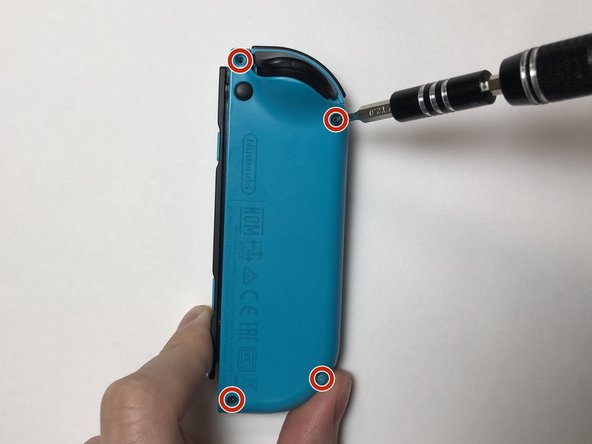
  • Screw in the four 6 mm Tri-point Y00 screws into the back of the Joy-Con.

将充电导轨对准 Joy-Con 左侧的凹槽。

在 Joy-Con 两侧均匀施压,直到两个外壳合一起。

将4颗6mm的Y00三点式螺钉拧入Joy-Con后部。

crwdns2944171:0crwdnd2944171:0crwdnd2944171:0crwdnd2944171:0crwdne2944171:0