crwdns2933423:0crwdne2933423:0

Sostituzione guida di carica Joy-Con sinistro

crwdns2935425:016crwdne2935425:0

crwdns2936315:0crwdne2936315:0
crwdns2936321:0crwdne2936321:0
crwdns2931653:016crwdne2931653:0
Left Joy-Con Charging Rail Replacement: crwdns2935265:00crwdnd2935265:01crwdnd2935265:03crwdne2935265:0 Left Joy-Con Charging Rail Replacement: crwdns2935265:00crwdnd2935265:02crwdnd2935265:03crwdne2935265:0 Left Joy-Con Charging Rail Replacement: crwdns2935265:00crwdnd2935265:03crwdnd2935265:03crwdne2935265:0
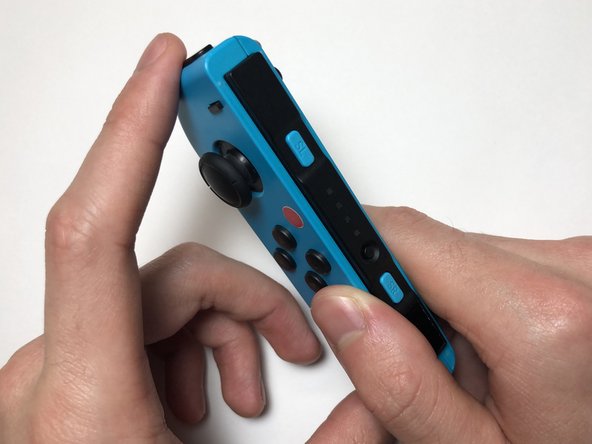
  • Align the charging rail into the notch on the left side of the Joy-Con.

  • Apply even pressure on both sides of the Joy-Con until the two shells click together.

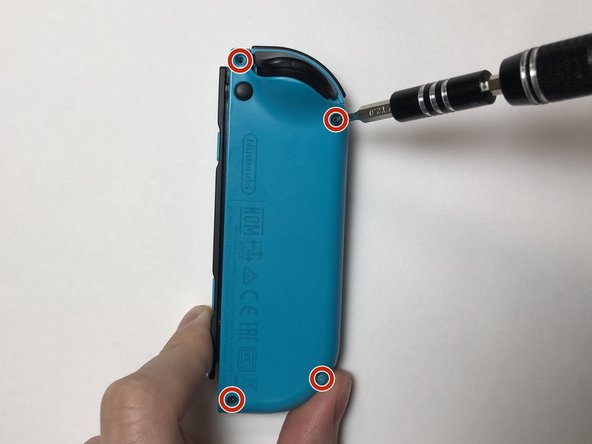
  • Screw in the four 6 mm Tri-point Y00 screws into the back of the Joy-Con.

Allinea la guida di carica nella rientranza sulla parte sinistra del Joy-Con.

Applica una pressione su entrambi i lati del Joy-Con finché le due metà non scattano insieme.

Avvita le quattro viti Tri-Point da 6 mm sul retro del Joy-Con.

crwdns2944171:0crwdnd2944171:0crwdnd2944171:0crwdnd2944171:0crwdne2944171:0