crwdns2933423:0crwdne2933423:0

左Joy-Con充电导轨的更换

crwdns2936315:0crwdne2936315:0
crwdns2936311:0crwdne2936311:0
crwdns2931653:010crwdne2931653:0
Left Joy-Con Charging Rail Replacement: crwdns2935265:00crwdnd2935265:01crwdnd2935265:03crwdne2935265:0 Left Joy-Con Charging Rail Replacement: crwdns2935265:00crwdnd2935265:02crwdnd2935265:03crwdne2935265:0 Left Joy-Con Charging Rail Replacement: crwdns2935265:00crwdnd2935265:03crwdnd2935265:03crwdne2935265:0
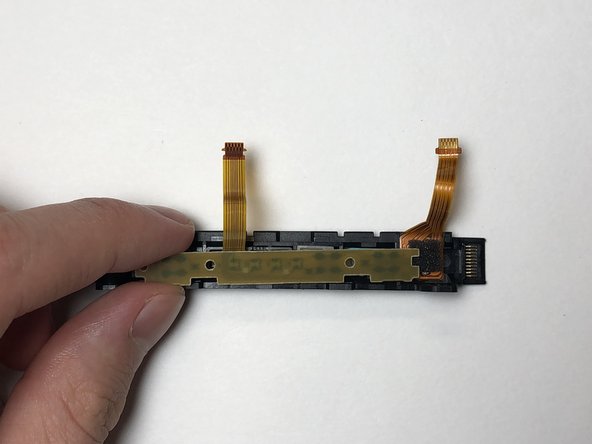
  • Place the SL, SR and sync buttons into the new charging rail and make sure the tabs on the SL and SR buttons fit into their respective socket grooves.

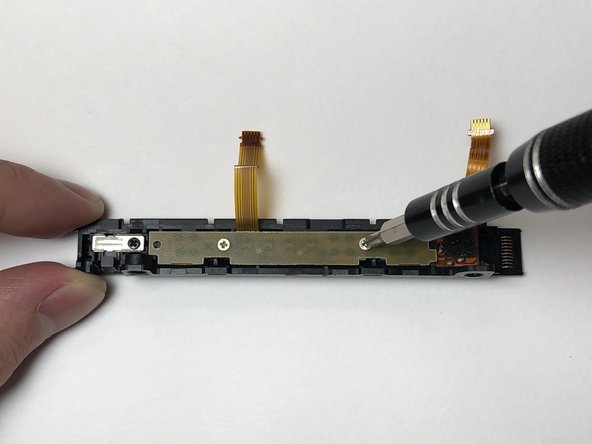
  • Place the PCB over the buttons and secure it in place using the two golden 3 mm Phillips #000 screws.

  • Potential for device damage. If the buttons are not properly placed into the charging rail, proceeding to screw in the PCB will cause it to warp.

将 SL、SR 和同步按钮放入新的充电导轨,并确保 SL 和 SR 按钮上的卡舌与各自的插槽凹槽相吻合。

将 PCB 板放在按钮上,用两颗金色 3 毫米十字 #000 号螺丝将其固定到位。

有设备损坏的可能性。如果按钮没有正确放入充电导轨,继续将PCB板拧入会导致其变形。

crwdns2944171:0crwdnd2944171:0crwdnd2944171:0crwdnd2944171:0crwdne2944171:0