crwdns2933423:0crwdne2933423:0

Sostituzione guida di carica Joy-Con sinistro

crwdns2936315:0crwdne2936315:0
crwdns2936321:0crwdne2936321:0
crwdns2931653:010crwdne2931653:0
Left Joy-Con Charging Rail Replacement: crwdns2935265:00crwdnd2935265:01crwdnd2935265:03crwdne2935265:0 Left Joy-Con Charging Rail Replacement: crwdns2935265:00crwdnd2935265:02crwdnd2935265:03crwdne2935265:0 Left Joy-Con Charging Rail Replacement: crwdns2935265:00crwdnd2935265:03crwdnd2935265:03crwdne2935265:0
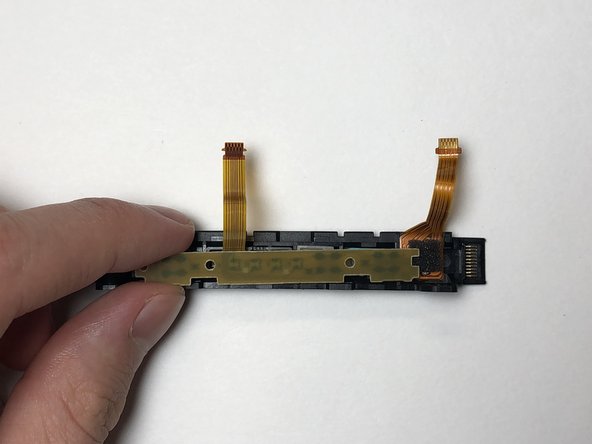
  • Place the SL, SR and sync buttons into the new charging rail and make sure the tabs on the SL and SR buttons fit into their respective socket grooves.

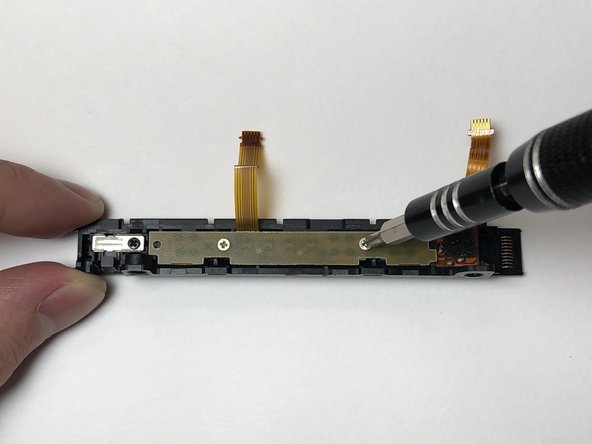
  • Place the PCB over the buttons and secure it in place using the two golden 3 mm Phillips #000 screws.

  • Potential for device damage. If the buttons are not properly placed into the charging rail, proceeding to screw in the PCB will cause it to warp.

Posiziona i tasti SL, SR e sync nella nuova guida di carica e assicurati che le alette sui tasti SL e SR si infilino nelle rispettive rientranze.

Appoggia la PCB sui tasti e fissala in posizione usando le due viti a croce Phillips #000 dorate da 3 mm.

Potenziali danni per il dispositivo. Se i tasti non sono posizionati correttamente nella guida di carica, avvitare la PCB la farà piegare.

crwdns2944171:0crwdnd2944171:0crwdnd2944171:0crwdnd2944171:0crwdne2944171:0