crwdns2933423:0crwdne2933423:0

Reemplazo de riel de carga del joy-con izquierdo

crwdns2936315:0crwdne2936315:0
crwdns2936331:0crwdne2936331:0
crwdns2931653:010crwdne2931653:0
Left Joy-Con Charging Rail Replacement: crwdns2935265:00crwdnd2935265:01crwdnd2935265:03crwdne2935265:0 Left Joy-Con Charging Rail Replacement: crwdns2935265:00crwdnd2935265:02crwdnd2935265:03crwdne2935265:0 Left Joy-Con Charging Rail Replacement: crwdns2935265:00crwdnd2935265:03crwdnd2935265:03crwdne2935265:0
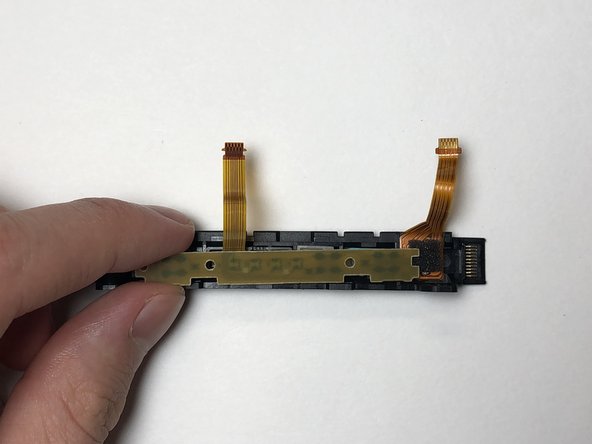
  • Place the SL, SR and sync buttons into the new charging rail and make sure the tabs on the SL and SR buttons fit into their respective socket grooves.

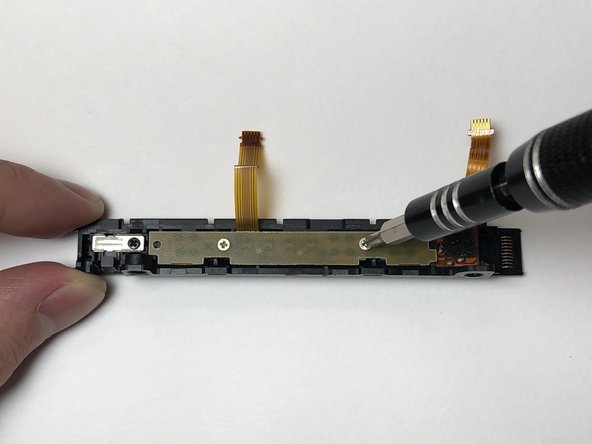
  • Place the PCB over the buttons and secure it in place using the two golden 3 mm Phillips #000 screws.

  • Potential for device damage. If the buttons are not properly placed into the charging rail, proceeding to screw in the PCB will cause it to warp.

Coloca los botones SL, SR y de sincronización en el nueva riel de carga y asegúrate que las pestañas de los botones SL y SR quepan en sus respectivos espacios

Coloca el PCB sobre los botones y asegúralos con los 2 tornillos dorados de 3mm con un destornillador Phillips #000

Daño potencial en el equipo. Si los botones no están colocados correctamente en el riel de carga, atornillar el PCB causará deformaciones

crwdns2944171:0crwdnd2944171:0crwdnd2944171:0crwdnd2944171:0crwdne2944171:0