crwdns2933423:0crwdne2933423:0

左Joy-Con充电导轨的更换

crwdns2936315:0crwdne2936315:0
crwdns2936311:0crwdne2936311:0
crwdns2931653:07crwdne2931653:0
Left Joy-Con Charging Rail Replacement: crwdns2935265:00crwdnd2935265:01crwdnd2935265:03crwdne2935265:0 Left Joy-Con Charging Rail Replacement: crwdns2935265:00crwdnd2935265:02crwdnd2935265:03crwdne2935265:0 Left Joy-Con Charging Rail Replacement: crwdns2935265:00crwdnd2935265:03crwdnd2935265:03crwdne2935265:0
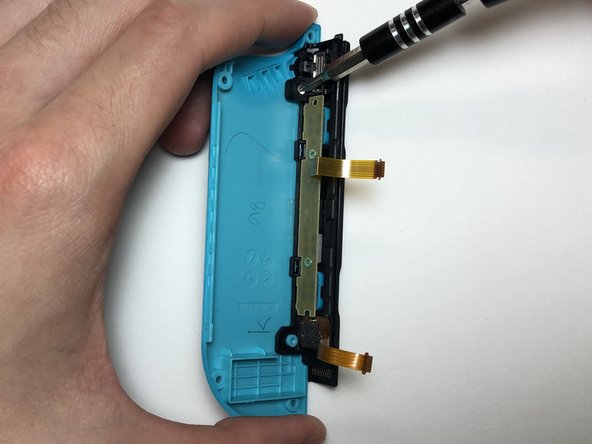
  • Remove the 2 mm Philips #000 screw holding the charging rail onto the back shell.

  • Remove the charging rail from the back shell.

  • There is an adhesive tape that helps keep the charging rail in place on the back shell. When placing the new charging rail onto the back shell, it is advised to also replace the adhesive to add extra support, but it is not essential.

将充电轨固定在后壳上的2毫米Philips #000螺钉卸下来。

从后壳上取下充电导轨。

后壳上有一个有助于保持充电轨不移位的胶带,当将新的充电轨放置到后壳上时,建议也更换胶带以达到更好的粘合性,但这不是必要的。

crwdns2944171:0crwdnd2944171:0crwdnd2944171:0crwdnd2944171:0crwdne2944171:0