crwdns2933423:0crwdne2933423:0

左側 Joy-Con 充電レールの交換

crwdns2936315:0crwdne2936315:0
crwdns2936323:0crwdne2936323:0
crwdns2931653:07crwdne2931653:0
Left Joy-Con Charging Rail Replacement: crwdns2935265:00crwdnd2935265:01crwdnd2935265:03crwdne2935265:0 Left Joy-Con Charging Rail Replacement: crwdns2935265:00crwdnd2935265:02crwdnd2935265:03crwdne2935265:0 Left Joy-Con Charging Rail Replacement: crwdns2935265:00crwdnd2935265:03crwdnd2935265:03crwdne2935265:0
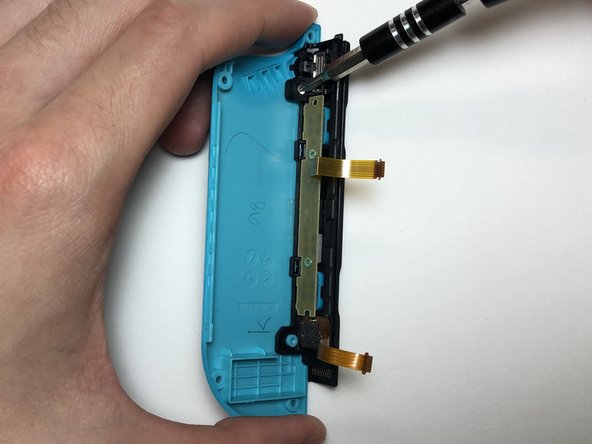
  • Remove the 2 mm Philips #000 screw holding the charging rail onto the back shell.

  • Remove the charging rail from the back shell.

  • There is an adhesive tape that helps keep the charging rail in place on the back shell. When placing the new charging rail onto the back shell, it is advised to also replace the adhesive to add extra support, but it is not essential.

充電用レールをバックシェルに固定している2mmの#000プラスネジを外します。

充電レールをバックシェルから取り外します。

充電レールをバックシェルの所定の位置に固定している接着テープがあります。新しい充電レールをバックシェルに取り付ける際は、接着剤も交換して補強することをお勧めしますが、必須ではありません。

crwdns2944171:0crwdnd2944171:0crwdnd2944171:0crwdnd2944171:0crwdne2944171:0