crwdns2933423:0crwdne2933423:0

Sostituzione guida di carica Joy-Con sinistro

crwdns2936315:0crwdne2936315:0
crwdns2936321:0crwdne2936321:0
crwdns2931653:07crwdne2931653:0
Left Joy-Con Charging Rail Replacement: crwdns2935265:00crwdnd2935265:01crwdnd2935265:03crwdne2935265:0 Left Joy-Con Charging Rail Replacement: crwdns2935265:00crwdnd2935265:02crwdnd2935265:03crwdne2935265:0 Left Joy-Con Charging Rail Replacement: crwdns2935265:00crwdnd2935265:03crwdnd2935265:03crwdne2935265:0
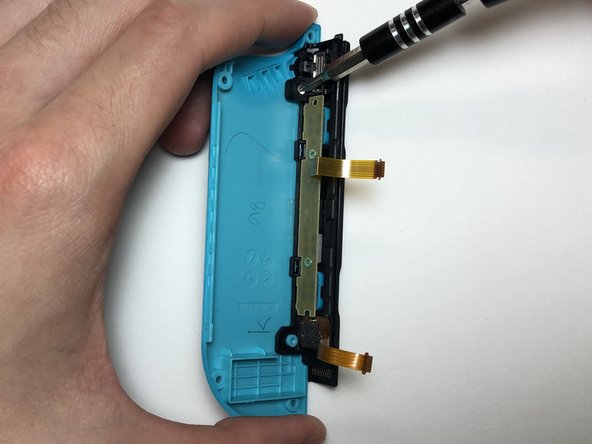
  • Remove the 2 mm Philips #000 screw holding the charging rail onto the back shell.

  • Remove the charging rail from the back shell.

  • There is an adhesive tape that helps keep the charging rail in place on the back shell. When placing the new charging rail onto the back shell, it is advised to also replace the adhesive to add extra support, but it is not essential.

Svita le due viti a croce Phillips #000 da 2 mm che fissano la guida di carica alla copertura posteriore.

Rimuovi la guida di carica dalla copertura posteriore.

C'è del nastro adesivo che aiuta la guida di carica a stare ferma sulla copertura posteriore. Quando posizioni la nuova guida di carica sulla copertura posteriore, ti consigliamo di sostituire anche l'adesivo per avere un migliore supporto, anche se non è necessario.

crwdns2944171:0crwdnd2944171:0crwdnd2944171:0crwdnd2944171:0crwdne2944171:0