crwdns2933423:0crwdne2933423:0

Changer le rail de chargement du Joy-Con gauche

crwdns2936315:0crwdne2936315:0
crwdns2936317:0crwdne2936317:0
crwdns2931653:07crwdne2931653:0
Left Joy-Con Charging Rail Replacement: crwdns2935265:00crwdnd2935265:01crwdnd2935265:03crwdne2935265:0 Left Joy-Con Charging Rail Replacement: crwdns2935265:00crwdnd2935265:02crwdnd2935265:03crwdne2935265:0 Left Joy-Con Charging Rail Replacement: crwdns2935265:00crwdnd2935265:03crwdnd2935265:03crwdne2935265:0
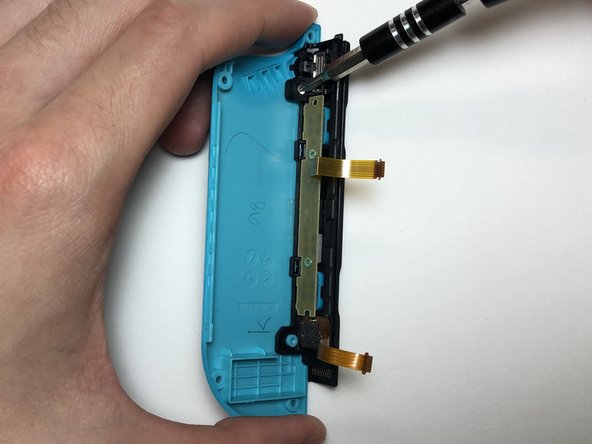
  • Remove the 2 mm Philips #000 screw holding the charging rail onto the back shell.

  • Remove the charging rail from the back shell.

  • There is an adhesive tape that helps keep the charging rail in place on the back shell. When placing the new charging rail onto the back shell, it is advised to also replace the adhesive to add extra support, but it is not essential.

Retirez la vis cruciforme #000 de 2 mm qui maintient le rail de chargement sur la coque arrière.

Retirez le rail de chargement de la coque arrière.

Un morceau de ruban adhésif aide à maintenir le rail de chargement en place sur la coque arrière. Lorsque vous placez le nouveau rail de chargement sur la coque arrière, il est conseillé de remplacer également l'adhésif pour ajouter un support supplémentaire, mais ce n'est pas essentiel.

crwdns2944171:0crwdnd2944171:0crwdnd2944171:0crwdnd2944171:0crwdne2944171:0