crwdns2933423:0crwdne2933423:0

why! W650SZ Motherboard Replacement

crwdns2936317:0crwdne2936317:0
crwdns2936315:0crwdne2936315:0
crwdns2931653:014crwdne2931653:0
why! W650SZ Remplacement de la carte mère, Remplacer la carte mère (suite): crwdns2935265:00crwdnd2935265:01crwdnd2935265:03crwdne2935265:0 why! W650SZ Remplacement de la carte mère, Remplacer la carte mère (suite): crwdns2935265:00crwdnd2935265:02crwdnd2935265:03crwdne2935265:0 why! W650SZ Remplacement de la carte mère, Remplacer la carte mère (suite): crwdns2935265:00crwdnd2935265:03crwdnd2935265:03crwdne2935265:0
Remplacer la carte mère (suite)
  • Parmi toutes les vis que vous venez d'enlever le deux vis plus longues que les autres correspondent aux emplacements indiqués sur la première image de cette étape.

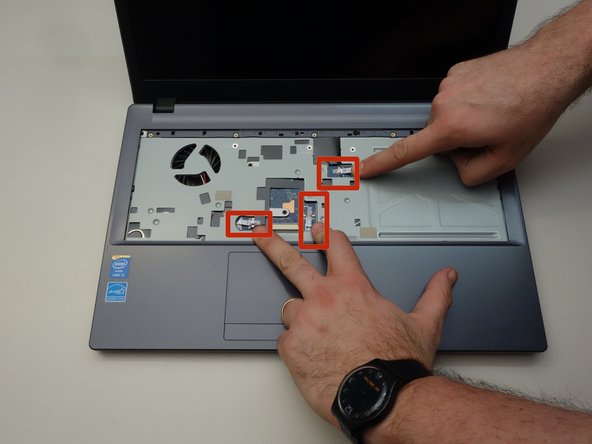
  • Retournez maintenant le portable et repérez les trois câbles de connexion comme indiqué dans la seconde image de cette étape.

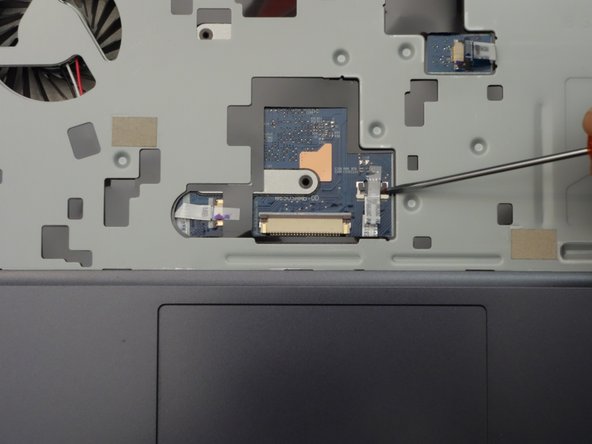
  • Commencez par libérer à l'aide d'un petit tourne vis le verrouillage à droite du câble plat.

Of all the screws you just removed the two screws that are longer than the others correspond to the locations shown in the first image of this step.

Flip the laptop over and locate the three connecting cables as shown in the second image of this step.

Use a small screwdriver to release the latch on the right of the flat cable.

crwdns2944171:0crwdnd2944171:0crwdnd2944171:0crwdnd2944171:0crwdne2944171:0