crwdns2933423:0crwdne2933423:0

Sustitución del IC de Carga Inalámbrica del iPhone X

crwdns2936315:0crwdne2936315:0
crwdns2936331:0crwdne2936331:0
crwdns2931653:06crwdne2931653:0
iPhone X Wireless Charging IC Replacement: crwdns2935265:00crwdnd2935265:01crwdnd2935265:03crwdne2935265:0 iPhone X Wireless Charging IC Replacement: crwdns2935265:00crwdnd2935265:02crwdnd2935265:03crwdne2935265:0 iPhone X Wireless Charging IC Replacement: crwdns2935265:00crwdnd2935265:03crwdnd2935265:03crwdne2935265:0
  • Let’s try to replace with a new wireless charging IC and see how it works.

  • Attach the lower layer to the PCB holder and apply some paste flux to the wireless charging IC.

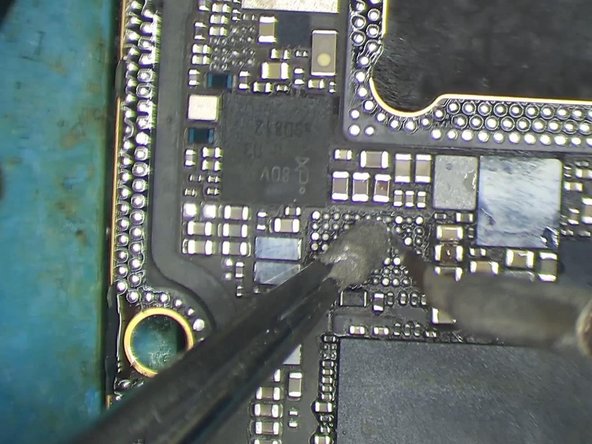
  • Heat with QUICK 990 AD Hot Air Gun at 360℃, air flow 3 for about 1 minute. Take down the wireless charging IC from the board with tweezers.

  • Continue to apply some medium-temp solder paste to the bonding pad. Heat with soldering iron at 365℃ to clean the bonding pad.

Intentemos reemplazarlo con un nuevo IC de carga inalámbrica y veamos cómo funciona.

Fija la capa inferior al soporte de PCB y aplica un poco de fundente en pasta al IC de carga inalámbrica.

Calienta con la pistola de aire caliente QUICK 990 AD a 360 ℃, flujo de aire 3 durante aproximadamente 1 minuto. Retira el IC de carga inalámbrica de la placa con pinzas.

Continúa aplicando un poco de pasta de soldadura de temperatura media a la almohadilla de unión. Calienta con soldador a 365 ℃ para limpiar la almohadilla de unión.

crwdns2944171:0crwdnd2944171:0crwdnd2944171:0crwdnd2944171:0crwdne2944171:0