crwdns2933423:0crwdne2933423:0

Remplacement de l'ensemble écran de l'iPhone 12 Pro

crwdns2931529:0crwdnd2931529:0crwdnd2931529:0crwdnd2931529:08crwdnd2931529:0crwdne2931529:0

crwdns2936315:0crwdne2936315:0
crwdns2936317:0crwdne2936317:0
crwdns2931653:07crwdne2931653:0
iPhone 12 Pro Display Assembly Replacement, Lift the screen slightly: crwdns2935265:00crwdnd2935265:01crwdnd2935265:03crwdne2935265:0 iPhone 12 Pro Display Assembly Replacement, Lift the screen slightly: crwdns2935265:00crwdnd2935265:02crwdnd2935265:03crwdne2935265:0 iPhone 12 Pro Display Assembly Replacement, Lift the screen slightly: crwdns2935265:00crwdnd2935265:03crwdnd2935265:03crwdne2935265:0
Lift the screen slightly
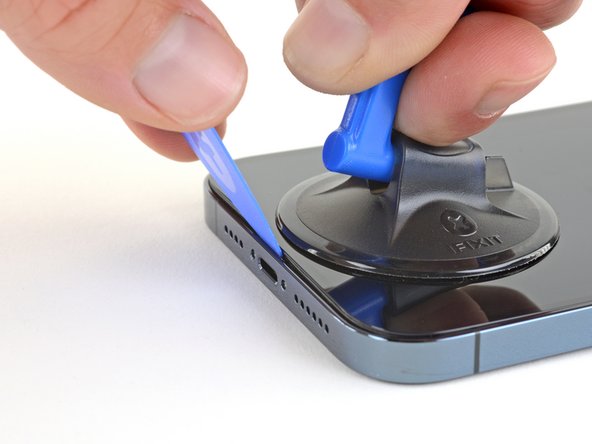
  • Pull up on the suction cup with firm, constant pressure to create a slight gap between the screen and the frame.

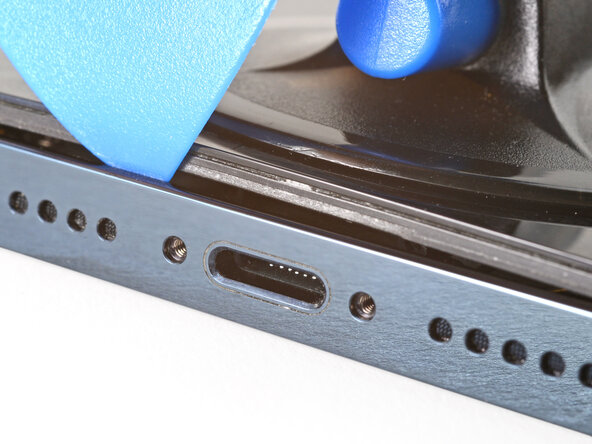
  • Insert an opening pick at a steep angle into the gap.

  • Make sure to insert the opening pick under the thick plastic bezel to avoid damaging your screen. You should see a visual gap, and the pick shouldn't catch on anything. If you can't see the gap, you'll need to pull the screen up more.

  • The watertight adhesive holding the screen in place is very strong; creating this initial gap takes a significant amount of force. If you're having a hard time opening a gap, apply more heat, and gently rock the screen up and down to weaken the adhesive until you create enough of a gap to insert your tool.

Tirez fermement et constamment sur la ventouse pour ouvrir un léger espace entre l'écran et le châssis.

Insérez un médiator d’ouverture à un angle prononcé dans l’espace.

Assurez-vous d'insérer le médiator sous le cadre en plastique épais pour éviter d'endommager l'écran. Vous devriez voir un espace et le médiator ne devrait pas accrocher d'éléments. Si vous ne voyez pas cet espace, vous devrez tirer davantage l'écran vers le haut.

L'adhésif étanche qui fixe l'écran est très résistant. Ouvrir ce petit espace nécessitera de forcer quelque peu. Si vous avez du mal, chauffez plus et faites jouer l'écran de haut en bas pour faire céder l'adhésif et créer l'espace destiné à votre outil.

crwdns2944171:0crwdnd2944171:0crwdnd2944171:0crwdnd2944171:0crwdne2944171:0