crwdns2933423:0crwdne2933423:0

Google Pixel 4a 5G 스크린 교체하기

crwdns2931529:0crwdnd2931529:0crwdnd2931529:0crwdnd2931529:014crwdnd2931529:0crwdne2931529:0

crwdns2935425:015crwdne2935425:0

crwdns2936315:0crwdne2936315:0
crwdns2936325:0crwdne2936325:0
crwdns2931653:015crwdne2931653:0
Google Pixel 4a 5G Screen Replacement, Remove the screen: crwdns2935265:00crwdnd2935265:01crwdnd2935265:03crwdne2935265:0 Google Pixel 4a 5G Screen Replacement, Remove the screen: crwdns2935265:00crwdnd2935265:02crwdnd2935265:03crwdne2935265:0 Google Pixel 4a 5G Screen Replacement, Remove the screen: crwdns2935265:00crwdnd2935265:03crwdnd2935265:03crwdne2935265:0
Remove the screen
  • Remove the screen.

  • To install a new screen:

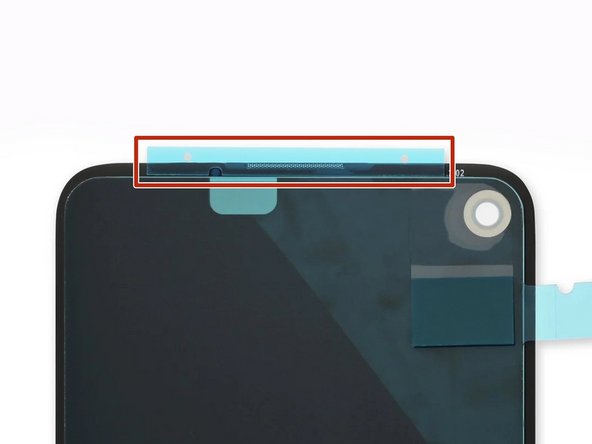
  • Check if your replacement screen has speaker mesh and top edge adhesive pre-installed.

  • If it does, you won't need the top edge adhesive.

  • If it doesn't, remove the larger clear liner from the top edge adhesive and apply it to the screen (not the frame). Make sure the larger cutout lines up with the speaker mesh.

  • Follow this guide to apply the custom-cut adhesive.

  • Use the third photo as a reference to position your adhesives.

  • During the boot-up process after reassembly, the screen will go through a calibration sequence. Don't touch the screen during this process, as it could result in improper touch calibration and create touch issues.

스크린을 분리하세요.

새 스크린을 설치하려면:

교체용 스크린에 스피커 메시와 상단 가장자리 접착제가 미리 설치되어 있는지 확인하세요.

설치되어 있다면 상단 가장자리 접착제가 필요하지 않습니다.

설치되어 있지 않은 경우 상단 가장자리 접착제에서 큰 투명 라이너를 제거하여 스크린(프레임이 아님)에 붙입니다. 더 큰 컷아웃이 스피커 메시와 일직선이 되도록 하세요.

이 안내서를 따라 맞춤형 접착제를 붙이세요.

세 번째 사진을 참고하여 접착제의 위치를 정하세요.

재조립 후 부팅하는 동안 스크린은 보정 절차를 거치게 됩니다. 이 과정에서 스크린을 만지지 마세요. 스크린을 만지면 터치 보정이 잘못되어 터치 문제가 발생할 수 있습니다.

crwdns2944171:0crwdnd2944171:0crwdnd2944171:0crwdnd2944171:0crwdne2944171:0