crwdns2933423:0crwdne2933423:0

How to Repair a Hole in the Ceiling

crwdns2936315:0crwdne2936315:0
crwdns2936321:0crwdne2936321:0
crwdns2931653:012crwdne2931653:0
How to Repair a Hole in the Ceiling: crwdns2935265:00crwdnd2935265:01crwdnd2935265:03crwdne2935265:0 How to Repair a Hole in the Ceiling: crwdns2935265:00crwdnd2935265:02crwdnd2935265:03crwdne2935265:0 How to Repair a Hole in the Ceiling: crwdns2935265:00crwdnd2935265:03crwdnd2935265:03crwdne2935265:0
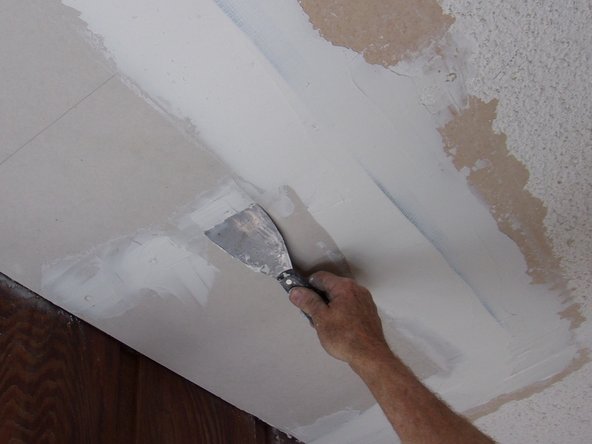
  • Switch to the 6" taping knife and continue applying joint compound in smooth swaths, working both side to side and lengthwise along the repair lines, until you have a flat, uniform layer that feathers over onto the existing ceiling. Pic 1.

  • Your layering should completely conceal the mesh tape; pay particular attention to overlapped corners where it is thicker—the idea is to blend the new piece with the existing ceiling so the repair isn't obvious. Pic 2.

  • Use joint compound to fill the slight depressions over each screw and any blemishes in the surface of the new piece. Pic 3.

  • Now STOP and allow the joint compound to dry thoroughly before sanding and applying a skim coat, popcorn mixture, ceiling texture, or paint. Allow at least 24 hours to dry thoroughly under most weather conditions.

crwdns2935429:0crwdne2935429:0

crwdns2935429:0crwdne2935429:0

crwdns2935429:0crwdne2935429:0

crwdns2935429:0crwdne2935429:0

crwdns2944171:0crwdnd2944171:0crwdnd2944171:0crwdnd2944171:0crwdne2944171:0