crwdns2933423:0crwdne2933423:0

Ducky One 2 Mini Cherry MX Schalter austauschen

crwdns2935425:07crwdne2935425:0

crwdns2936315:0crwdne2936315:0
crwdns2936319:0crwdne2936319:0
crwdns2931653:07crwdne2931653:0
Ducky One 2 Mini Cherry MX Switch Replacement: crwdns2935265:00crwdnd2935265:01crwdnd2935265:03crwdne2935265:0 Ducky One 2 Mini Cherry MX Switch Replacement: crwdns2935265:00crwdnd2935265:02crwdnd2935265:03crwdne2935265:0 Ducky One 2 Mini Cherry MX Switch Replacement: crwdns2935265:00crwdnd2935265:03crwdnd2935265:03crwdne2935265:0
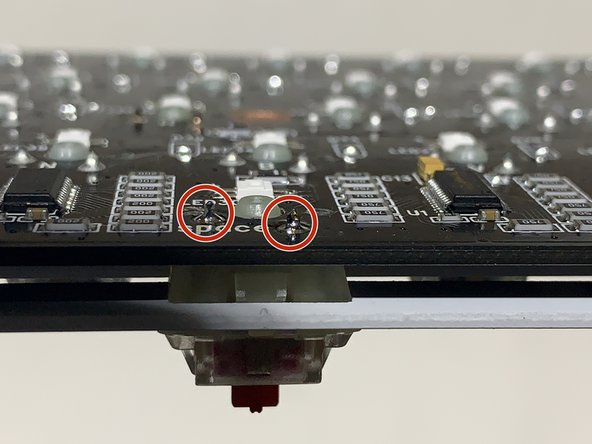
  • Flip the board over and you will see the two pins inside the slots for the letters.

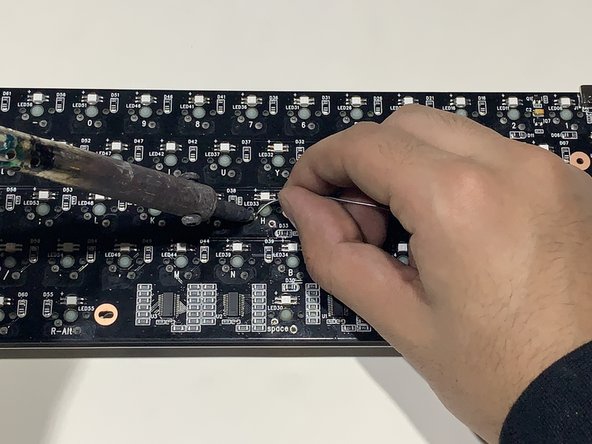
  • Use the soldering iron to solder the pins to the slots on the board until the pins are covered in solder.

  • Repeat for the second pin on the switch and until all the switches are soldered to the board.

  • Once all switches are replaced repeat Steps 1 and 2 in reverse order.

Wenn du die Platine nun wieder umdrehst, solltest du die beiden Pins des Schalters sehen.

Verlöte die Pins nun wieder mit den Kontakten auf der Platine.

Wiederhole dies für den zweiten Lötstift am Schalter und um alle anderen Schalter auf der Platine zu verlöten.

Sobald du fertig bist, wiederhole einfach Schritte 1 und 2 in umgekehrter Reihenfolge.

crwdns2944171:0crwdnd2944171:0crwdnd2944171:0crwdnd2944171:0crwdne2944171:0