crwdns2933423:0crwdne2933423:0

Ducky One 2 Mini Cherry MX Schalter austauschen

crwdns2936315:0crwdne2936315:0
crwdns2936319:0crwdne2936319:0
crwdns2931653:04crwdne2931653:0
Ducky One 2 Mini Cherry MX Switch Replacement: crwdns2935265:00crwdnd2935265:01crwdnd2935265:03crwdne2935265:0 Ducky One 2 Mini Cherry MX Switch Replacement: crwdns2935265:00crwdnd2935265:02crwdnd2935265:03crwdne2935265:0 Ducky One 2 Mini Cherry MX Switch Replacement: crwdns2935265:00crwdnd2935265:03crwdnd2935265:03crwdne2935265:0
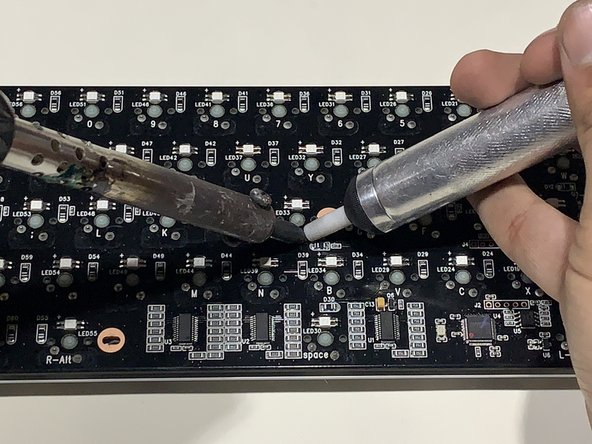
  • Flip the board over and you will notice two soldered pins near each letter on the keyboard.

  • Hold the soldering iron on the pins for a few seconds and remove with the de-soldering pump.

  • Once both the pins are clear of solder, the pins should move freely in the slots.

  • When heating the soldered pins, do not let the iron touch the board to avoid any damage.

  • Do Not Touch the neck of the solder iron when plugged in to avoid any harm.

Drehe nun die Platine um. Du solltest bei jedem Buchstaben zwei Lötstifte sehen.

Heize die beiden Lötstifte mit dem Lötkolben auf und entferne das Lötzinn mit einer Entlötsaugpumpe.

Die beiden Stifte sollten sich nun frei bewegen können.

Achte darauf, mit dem Lötkolben nicht andere Bereiche der Platine zu berühren, um jeglichen Schaden zu vermeiden.

Berühre niemals die Spitze des Lötkolbens, wenn er in Betrieb ist!

crwdns2944171:0crwdnd2944171:0crwdnd2944171:0crwdnd2944171:0crwdne2944171:0