crwdns2933423:0crwdne2933423:0

Changement écran Samsung Galaxy S20 Ultra

crwdns2936315:0crwdne2936315:0
crwdns2936317:0crwdne2936317:0
crwdns2931653:04crwdne2931653:0
Samsung Galaxy S20 Ultra Screen Replacement: crwdns2935265:00crwdnd2935265:01crwdnd2935265:03crwdne2935265:0 Samsung Galaxy S20 Ultra Screen Replacement: crwdns2935265:00crwdnd2935265:02crwdnd2935265:03crwdne2935265:0 Samsung Galaxy S20 Ultra Screen Replacement: crwdns2935265:00crwdnd2935265:03crwdnd2935265:03crwdne2935265:0
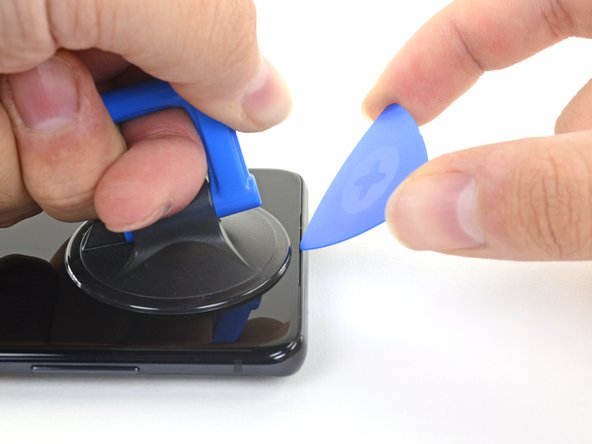
  • Apply a suction cup to the display glass, as close to the center of the top edge as possible.

  • If your display is badly cracked, covering it with a layer of clear packing tape may allow the suction cup to adhere. Alternatively, very strong tape may be used instead of the suction cup. If all else fails, you can superglue the suction cup to the broken screen.

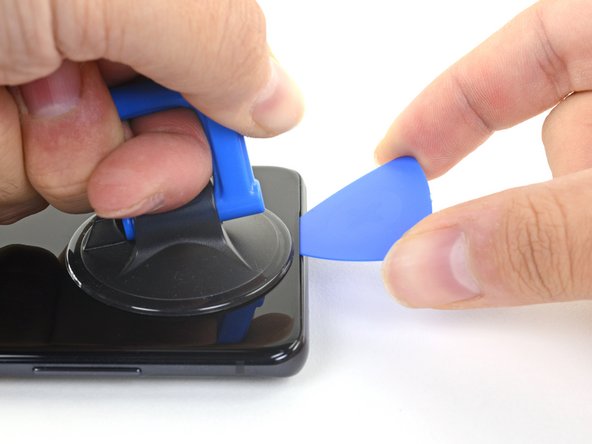
  • Pull on the suction cup with strong, steady force to create a gap between the display glass and the frame.

  • Insert the point of an opening pick into the gap in the center of the earpiece speaker notch, working it downwards underneath the display.

  • Ensure the pick slides over the front-facing camera and is not pushing against it.

  • Due to the stubborn adhesive, this may take multiple attempts of reheating with the iOpener and lifting with the suction cup before you get it right.

  • If you are having trouble creating a gap, apply more heat to the edge and try again.

  • Leave your pick in the seam to prevent the adhesive from reasealing.

Posez une ventouse sur la vitre de l'écran, aussi près que possible du centre du bord supérieur.

Si votre écran est très fissuré, le recouvrir d'une couche de ruban adhésif d'emballage transparent peut permettre à la ventouse de mieux adhérer. Il est également possible d'utiliser du ruban adhésif très résistant à la place de la ventouse. En dernier recours, vous pouvez coller la ventouse à l'écran cassé.

Tirez sur la ventouse de manière forte et régulière pour créer un interstice entre la vitre de l'écran et le châssis.

Insérez la pointe d'un médiator dans l'interstice situé au centre de l'encoche du haut-parleur interne et faites-le glisser sous l'écran vers le bas.

Assurez-vous que le médiator glisse sur la caméra frontale et ne la heurte pas.

En raison de l'adhésivité tenace, il faudra peut-être plusieurs tentatives (chauffer avec l'iOpener et soulever avec la ventouse) avant d'y parvenir.

Si vous avez des difficultés à créer un interstice, appliquez plus de chaleur sur le bord et réessayez.

Laissez votre médiator dans la jointure pour éviter que l'adhésif ne colle à nouveau.

crwdns2944171:0crwdnd2944171:0crwdnd2944171:0crwdnd2944171:0crwdne2944171:0