crwdns2931529:0crwdnd2931529:0crwdnd2931529:0crwdnd2931529:02crwdnd2931529:0crwdne2931529:0
crwdns2935425:015crwdne2935425:0


-
"Tamping Assembly"
-
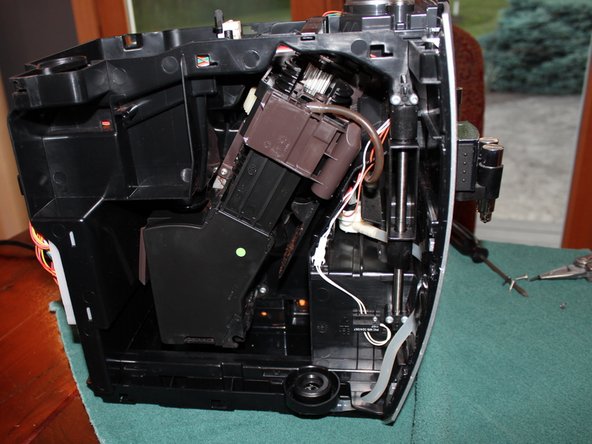
I call the black plastic diagonal assembly with the brown top the "tamping assembly". It receives the ground coffee, forms the puck, holds the puck while the water/steam goes through it, and then drops it in the waste tray (I presume).
-
Note If you choose to remove the tamping assembly you should carefully note where the brown portion is on the larger centre plastic screw. Maybe take a picture, or count exactly how many threads are above the brown portion.
-
When you reassemble, this it needs to be in the exact orientation it was in when you took it apart or it might break the machine. I realised it was a timing mechanism after having taken it apart and misaligned it. Luckily I had pictures to help get it back to the starting position.
-
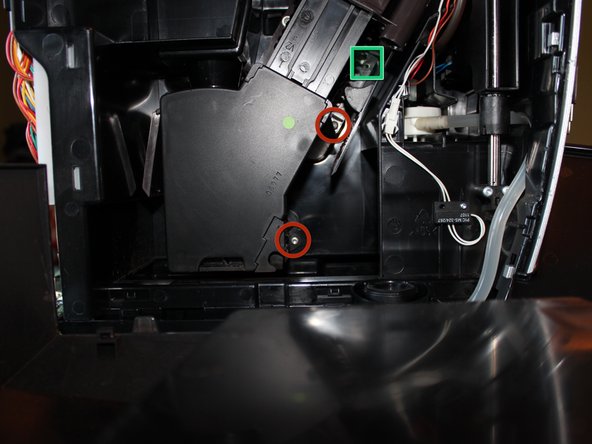
Remove the three T15 screws marked with the red circles. Top two are fine thread and bottom course thread. Note the screw marked with a blue sqaure does not need to be removed to remove the tamping assembly.
-
Also note the unused screw hole marked with a green square. You might need a long handled screw driver or an extension bit.
crwdns2944171:0crwdnd2944171:0crwdnd2944171:0crwdnd2944171:0crwdne2944171:0