crwdns2933423:0crwdne2933423:0

iMac 2011 固態硬碟更換

crwdns2931529:0crwdnd2931529:0crwdnd2931529:0crwdnd2931529:02crwdnd2931529:0crwdne2931529:0

crwdns2935425:09crwdne2935425:0

crwdns2936315:0crwdne2936315:0
crwdns2936311:0crwdne2936311:0
crwdns2931653:09crwdne2931653:0
iMac 2011 SSD Replacement: crwdns2935265:00crwdnd2935265:01crwdnd2935265:03crwdne2935265:0 iMac 2011 SSD Replacement: crwdns2935265:00crwdnd2935265:02crwdnd2935265:03crwdne2935265:0 iMac 2011 SSD Replacement: crwdns2935265:00crwdnd2935265:03crwdnd2935265:03crwdne2935265:0
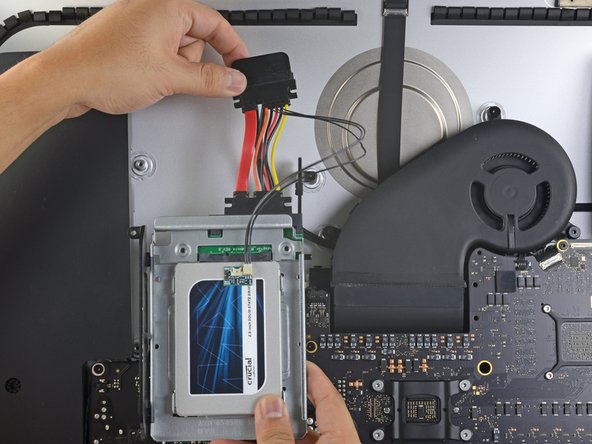
  • The images used in this step come from a 2017 iMac. Your cables may look slightly different, but the procedure remains the same.

  • Slide the SSD enclosure into the space previously occupied by the hard drive.

  • Route the SATA cables so that they will not interfere with any other components.

  • Try to keep the cables free from any sharp bends, and route them such that they are not pinched.

步驟中示範的機型為iMac 2017,你的線可能會不太一樣,但過程皆是一樣的

將SSD裝回原本安裝硬碟的位置

將SATA線調整到不會與其他配件起衝突的位置上

讓盡量避免電纜出現任何大的彎曲,並且確保它不會被夾住

crwdns2944171:0crwdnd2944171:0crwdnd2944171:0crwdnd2944171:0crwdne2944171:0