crwdns2933423:0crwdne2933423:0

Why! NH57ADS Motherboard Replacement

crwdns2935425:01crwdne2935425:0

crwdns2936317:0crwdne2936317:0
crwdns2936315:0crwdne2936315:0
crwdns2931653:01crwdne2931653:0
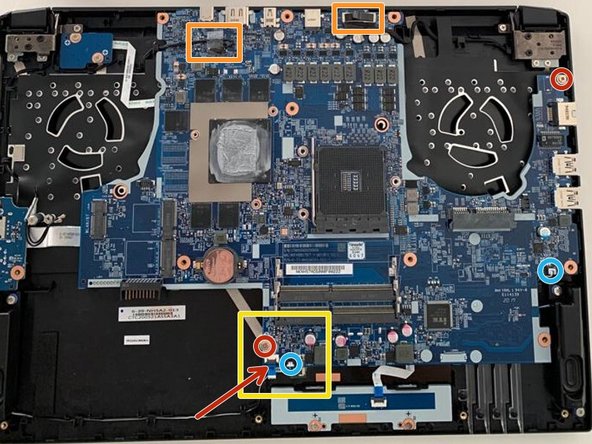
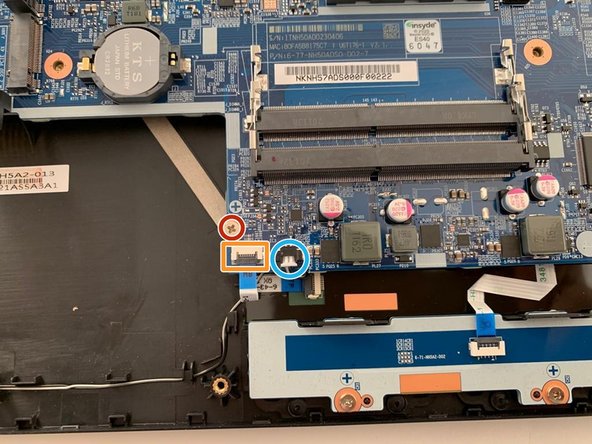
Carte-mère, MB 1: crwdns2935265:00crwdnd2935265:01crwdnd2935265:03crwdne2935265:0 Carte-mère, MB 1: crwdns2935265:00crwdnd2935265:02crwdnd2935265:03crwdne2935265:0 Carte-mère, MB 1: crwdns2935265:00crwdnd2935265:03crwdnd2935265:03crwdne2935265:0
MB 1
  • Enlever les les câbles se trouvant sous le clavier, en levant gentiment la nappe.

  • Dévisser les 2 vis balisées en rouges.

  • Déconnecter les hauts parleurs (balisé en turquoise).

  • Soulever doucement la nappe et enlever la connectique se trouvant entre la vis et le haut parleur.

Lift the retaining latches and remove the two ribbon cables located under the keyboard.

Remove the two remaining Phillips screws securing the motherboard.

Carefully unplug the two speaker cables using fingernails of fine tip tweezers. Do not pull on the delicate wires, as they can break easily.

Flip up the retaining latch on the ZIF connector between the speaker connector and the mounting screw. Remove the flex cable from the connector.

crwdns2944171:0crwdnd2944171:0crwdnd2944171:0crwdnd2944171:0crwdne2944171:0