crwdns2933423:0crwdne2933423:0

Samsung Galaxy S20 スクリーンの交換

crwdns2936315:0crwdne2936315:0
crwdns2936323:0crwdne2936323:0
crwdns2931653:04crwdne2931653:0
Samsung Galaxy S20 Screen Replacement: crwdns2935265:00crwdnd2935265:01crwdnd2935265:03crwdne2935265:0 Samsung Galaxy S20 Screen Replacement: crwdns2935265:00crwdnd2935265:02crwdnd2935265:03crwdne2935265:0 Samsung Galaxy S20 Screen Replacement: crwdns2935265:00crwdnd2935265:03crwdnd2935265:03crwdne2935265:0
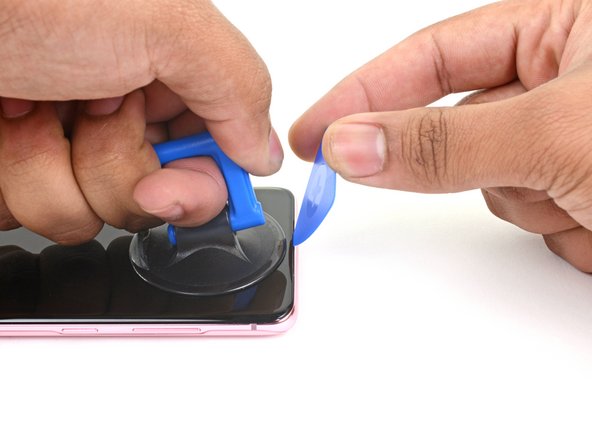
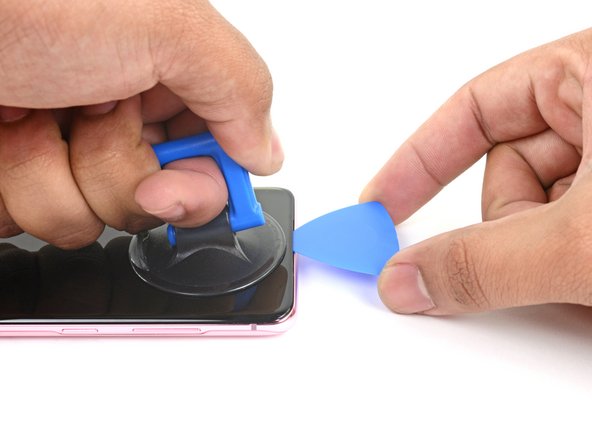
  • Apply a suction cup to the display glass, as close to the center of the top edge as possible.

  • If your display is badly cracked, covering it with a layer of clear packing tape may allow the suction cup to adhere. Alternatively, very strong tape may be used instead of the suction cup. If all else fails, you can superglue the suction cup to the broken screen.

  • Pull on the suction cup with strong, steady force to create a gap between the display glass and the frame.

  • Insert the point of an opening pick into the gap in the center of the earpiece speaker notch, working it downwards underneath the display.

  • Ensure the pick slides over the front-facing camera and is not pushing against it.

  • Due to the stubborn adhesive, this may take multiple attempts of reheating with the iOpener and separating with the suction cup before you get it right.

  • If you are having trouble creating a gap, apply more heat to the edge and try again.

  • Leave your pick in the seam to prevent the adhesive from reasealing.

吸盤をディスプレイガラスの上部端中央に近い位置に装着します。

ディスプレイの破損程度が酷い場合は、透明の梱包テープを表面に貼ると、吸盤をしっかりと装着できるかも知れません。代わりに、非常に強力な粘着テープを吸盤の代わりに使うこともできます。それでも上手くいかない場合は、強力な接着剤で吸盤を貼り付けてください。

吸盤をしっかりと強く一定の力で引き上げ、ディスプレイガラスとフレームの間に隙間を作ってください。

開口ピックをイヤピーススピーカーの切り欠きの真ん中の隙間に差し込みます。ディスプレイの下側に向けて差し込んでください。

ピックはフロントカメラの上をスライドさせてください。ピックでカメラを押さないでください。

強力な接着剤のため、iOpenerで温めて吸盤で引っ張る作業を何回も繰り返す必要があるかも知れません。

隙間がうまく作れない場合は、デバイスの端を温め直してから作業をやり直してください。

接着剤の再装着を防ぐため、ピックを継ぎ目の間に残します。

crwdns2944171:0crwdnd2944171:0crwdnd2944171:0crwdnd2944171:0crwdne2944171:0