crwdns2935425:013crwdne2935425:0
crwdns2931653:013crwdne2931653:0


-
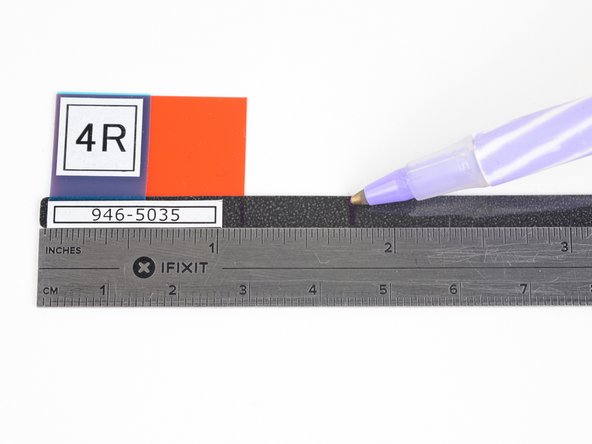
Measuring from the left end of strip 4R (the end with the labels) make two marks on the strip as guides for where to cut.
-
Make the first mark 1⅛ inches (28.6 mm) from the left edge.
-
Make the next mark 1¾ inches (44.5 mm) from the left edge.
-
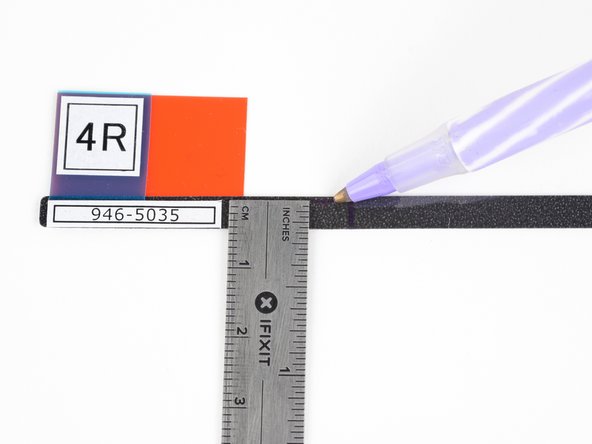
Measuring from the bottom edge of the strip, make a third mark in between the first two 5/32 inches (4 mm) up from the bottom edge.
| [* black] Measuring from the left end of strip 4R (the end with the labels) make two marks on the strip as guides for where to cut. | |
| - | [* black] Make the first mark |
| - | [* black] Make the next mark |
| - | [* black] Measuring from the bottom edge of the strip, make a third mark in between the first two |
| + | [* black] Make the first mark 1⅛ inches (28.6 mm) from the left edge. |
| + | [* black] Make the next mark 1¾ inches (44.5 mm) from the left edge. |
| + | [* black] Measuring from the bottom edge of the strip, make a third mark in between the first two 5/32 inches (4 mm) up from the bottom edge. |
| [* icon_note] This cut will be very close to the top edge of the adhesive strip, but it's important that you leave material over top of the adhesive strip for proper sound isolation. When in doubt, remove less material than you think you need to. If the adhesive still covers the microphone you can always make the notch bigger. |
crwdns2944171:0crwdnd2944171:0crwdnd2944171:0crwdnd2944171:0crwdne2944171:0