crwdns2933423:0crwdne2933423:0

Nintendo Switch Lite LCDの交換

crwdns2931527:0crwdnd2931527:0crwdnd2931527:0crwdnd2931527:0crwdne2931527:0

crwdns2936315:0crwdne2936315:0
crwdns2936323:0crwdne2936323:0
crwdns2931653:013crwdne2931653:0
Nintendo Switch Lite LCD Replacement: crwdns2935265:00crwdnd2935265:01crwdnd2935265:03crwdne2935265:0 Nintendo Switch Lite LCD Replacement: crwdns2935265:00crwdnd2935265:02crwdnd2935265:03crwdne2935265:0 Nintendo Switch Lite LCD Replacement: crwdns2935265:00crwdnd2935265:03crwdnd2935265:03crwdne2935265:0
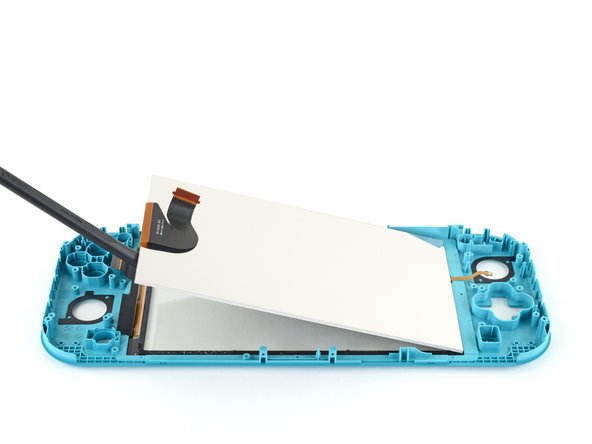
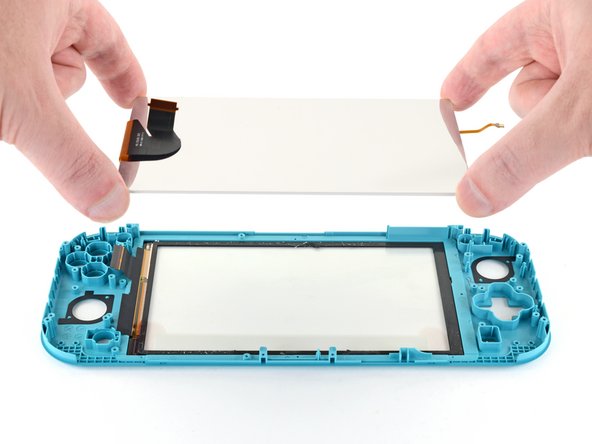
  • Use the flat end of a spudger or your fingers to lift the LCD up and out of the frame to remove it.

  • If you're reusing the LCD (or your new LCD does not come with pre‑installed adhesive), follow this guide to install pre-cut adhesive around the perimeter before reassembly.

スパッジャーの平面側先端もしくは指先で、LCDを持ち上げて、フレームから取り出します。

LCDを再利用する場合(もしくは新しいLCDにプレインストールされた接着剤が付いていない場合)、再組み立ての前に、このガイドを参照して、フレーム周辺にプレカットした接着剤を装着してください。

crwdns2944171:0crwdnd2944171:0crwdnd2944171:0crwdnd2944171:0crwdne2944171:0